Showing posts with label reflections. Show all posts

Wednesday, 19 April 2023

Focus stacked 3D Stereo pair images - A possible game changer for macro photography?

  After joining the Allan Walls macro community I became aware of stereo imaging due to a challenge being set and a great introductory tutorial. So I threw myself into a new challenge as its just the type of photography I can do from home when Im not managing to do much.

To start with I tried photographing 3 focus stacks of the same subject - ( a taxidermy insect specimen or flower) where I rotated the subject aprox 4-8 degrees between the stacks. When viewed side by side this should produce a 3D image and I was pleasantly surprised when my results paid off very quickly. Although at first I was unaware that if the images are placed in the wrong order the 3D image can appear as if its going away from you rather that the  goal of it coming towards you. 


Now getting everything prepared, set up, lighting right, the focus stacking done correctly, then the lengthy process of stacking images in appropriate software followed by finely detailed editing to ensure each image is edited precisely the same is not for the faint hearted. I have had to learn about taxidermy insect specimens, where to obtain them, how to clean and relax and position them, followed by the fiddly process of setting them up for photos. Then the lighting  can take time as many of these subjects can be super shiny, requiring several layers of diffusion material to avoid specular highlights, plus mini reflectors made from foil to lighten up the areas light doesnt reach. All this within a very tight space, often with the lens within  inches of the subject.


I have now changed from using Michaels Z6 and using my own Sony A7iii on my new WeMacro automated rail which I do prefer for focus stacking - this is controlled on my phone. I feel that almost all my focus stacking works well with this set up, where previously I often had errors in the stacks.

I am using a variety of lens but mostly my Sony 90mm macro lens, sometimes with extension tubes, and sometimes with a Raynox 250. My other main choice of lens is my new Canon MPE 65 MPE, which is taking a bit of getting use to, but is giving me great results. This requires an adapter to fit my camera and I have had some minor issues with connectivity, but Im persevering.


Now that I have had a couple of months practicing the techniques I think Im ready to attempt getting more adventurous with my set ups and will try to add in more depth, using both insects and layers of flowers. Ultimately I want to do this to give lots of depth and interest, loads of details but whilst retaining some of the out of focus bokeh that I love. So its a journey to see what I can create. 


If you are new to stereo photography I will warn you that not everyone is able to view these easily, some people can only see the 3D image with a 3D stereoscopic viewer. I'm very lucky, I can easily defocus my eyes and see most stereo pairs within seconds.  At first I found that crossing my eyes and bringing the images closer to my eyes then very slowly moving the images away, helped me to see the 3D version. Sometimes I find it easier on my computer, sometimes on my phone. 


What I love is seeing macro images that 2-5x life size as stereo pairs as these show depth and detail like I have not seen before, this excites me and is what is pushing me to create more.

I have since come across Brian May's website where I am learning a bit more about this genre, here he encourages people to try creating stereo pairs using mobile phones and a dedicated app - something I intend to try soon. I have purchased a pair of his owl viewers but neither my partner nor I can see the stereo images using these. His websites contain many other useful links and I am working my way through these to learn more. I've not found many photographers using this technique in focus stacking macro photos, but hoping to soon as it will be good to connect with more who are interested in it. 
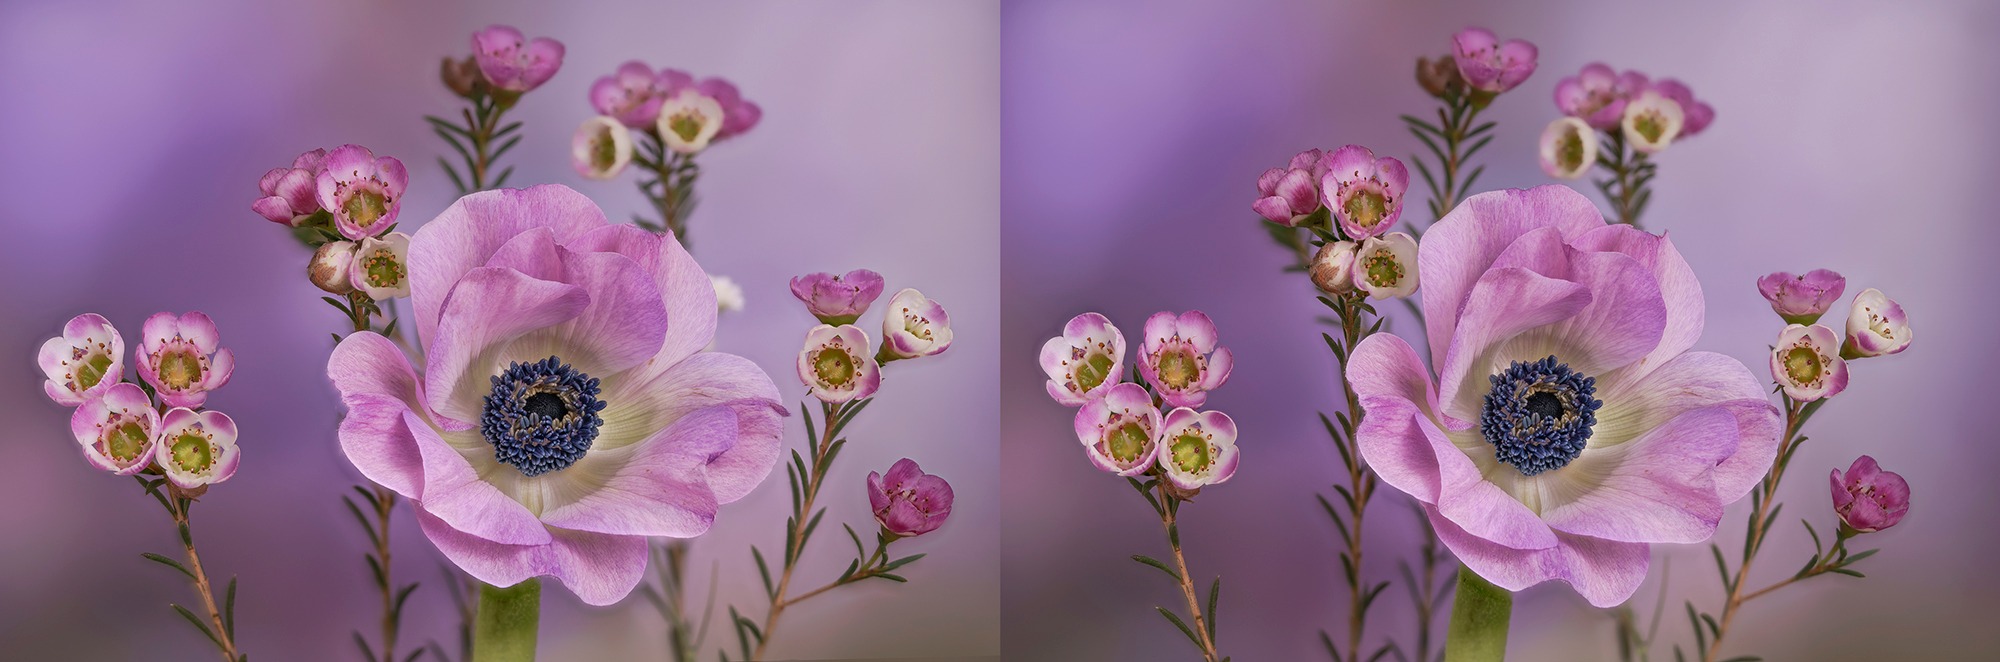

As for editing the pairs of focus stacked images - this can take hours if the insects are not pristine. If they are not edited identically this can throw off the stereo effect and it just wont work properly.

Watch this space for more this year as its a project I intend to work on all year. I would love to hear your thoughts on this project and any suggestion in the comments or in a message on social media. - EDIT a couple of days after writing this someone suggested that it may be easier for people to view the 3D images if I presented them as 3 images and yes, more people who could not see the 3D version with two images can now see them for the first time. So at the bottom I have added the triple image versions. 


Tuesday, 12 January 2021

Lockdown photography - part 2

Ideas to photograph at home

 A few more ideas to get the creative juices flowing whilst we are spending most of our time at home. My brain isn't functioning well enough to go into detail of how to do each one so please excuse that, but hopefully the ideas will prompt further exploration and search engines will help you find full instructions. I have included some useful links to help.

Liquids

 Oil on water

This is a fairly easy one, although can be a bit fiddly setting up and getting everything just right- take a glass container such as a casserole dish and stand it across two stacks of books, with a gap underneath ( so it looks like a bridge)  or other sturdy props so that you can place something colourful underneath ( I use a tablet with colourful photo). Or use a tall glass/measuring jug and fill it with water and stand that on your chosen colourful backdrop. Once everything is steady and you feel you have the right height of water to get the background you desire then pop in drops of oil and stir gently. Make sure your glass container and stirring item are super clean with no dust. Photograph from above- a tripod can be useful for this and takes a good deal of work out of it - setting the focus up and locking it, then shooting on live view means you can do this more comfortably. If using a macro lens and getting quite close then you can often get away with closing down your aperture to get the drops of oil nicely in focus whilst the backdrop is out of focus due to  close up work. It will take trial and error to get your distances and amounts of water right. One drop of washing up liquid added to the water when everything is still and set up will help with your droplets.

This image below was photographed by a lovely online friend Kathryn Willett - she used an ipad below to get this look. ( Kathryn also produces wonderful animal photography)


Soap bubbles/soap suds - lit up to show irridescent rainbow colours - here is a link to show how to obtain these colour abstract images. Soap bubble technique


Or try photographing bubbles full of smoke by holding an incense stick underneath the bubble blower that comes with a little bottle of kids bubbles liquid. Smoking bubbles  Smoking bubbles 2


Refractions in Droplets on wire or stem/flower 


Raindrops or spray on glass ( or other surfaces) - Handy as textures but also can make wonderful abstracts. This one below is just water sprayed on glass with flowers underneath.


Droplet Splash or droplet collisions
I've not done this in about ten years, so excuse the low res pics. You don't need expensive equipment - some aquarium tubing and a valve to sort drops out, its not so easy getting the collisions this way but I did manage some. Best to read up how to do this for good results - I used to set up in a dark room to avoid ambient light causing issues and adding various substances to your water/liquid can help get more interesting results ( I seem to remember a lot of people used to use something called Rinse aid). A couple of flashes that work at 1/128 speed are very handy too. Its fun and addictive. Try using a a CD for colourful reflections for something unusual or add milk to the water dripping into the bowl. I used to challenge an old friend to produce more creative droplet collisions giving him the idea set ups as he was so much better at it then me - from wine glasses, coffee cups to a boiled egg shell or mushroom. 


Liquids jumping due to vibrations
Another thing Ive not tried myself but would love to. If you type in "Paint on speaker " into your search engine or youtube you will get to see pics and videos. They're very eye catching.


Liquids in bottles or glasses and dripping ink/paint/milk into water
Check out the wonderful creative splash art by Mark Hunter for some creative inspiration using glasses, bottles and much more Mark A Hunter Photography He has also put together info on mixing liquids for photography liquid photography


Ice cubes or containers of ice with items frozen within


Reflections - either at home or on a walk


Items being dropped into water or actually submerged in water - this is a really old pic - I will post a better one soon


Abstract images using ink/paint and alcohol ink or nail varnish floating on water
Make it rain - spray water in a scene and capture the droplets falling either frozen still or using long exposure
Droplets on top of a CD ( Another old pic from about ten years ago just to give an idea) 


Freezing bubbles in the snow or in the freezer can give fun effects
How to photograph bubbles in the snow


Chase your dreams as they can come true!

 Its been a while - 10 months since my last blog with several reasons for that. 2024 catch up My year started out great, I was enjoying play...