Showing posts with label depth of field. Show all posts

Friday, 24 December 2021

My Focus stacking journey part 2

 Back in February I wrote a little on how I was starting to try out focus stacking and ended up trying out some super close ups of an interesting beetle and other small objects such as tulip stamens. These images involved a great deal of patience and up to 300 photos per stack. Since then I moved on to using focus stacking out doors for floral and fungi images, which luckily required a lot less frames due to the nature of what I was capturing. I would say that most of my photography from late spring through to winter was centred around trying to produce floral or fungi images with a nice out of focus foreground and background whilst getting as much of the subject in focus as possible. Whilst using a longer lens helped me to achieve this on location at time, it was not always practical or possible, so this is where focus stacking came in useful. I did also try a few floral images where everything was in focus such as the lovely Red Ranunculus below which took 78 photos stacked to get this result, using the Nikon Z6 plus Sigma 105 macro lens shooting at F18 with lighting to get every tiny detail. Whilst I like it, I prefer the atmosphere and mood that a bit of shallow depth of field gives such as the next image of the same flower below where I combined a short stack shot at F10 of the centre part of the plant with a shallow depth of field shot.


For further comparison below is a single shot taken with my Sony A7ii plus Sony 90mm macro lens at F18, using studio lighting, of the same flower. Now this is my favourite of the 3 images, with the 1st shot being my least favourite.


I have also been lucky enough to have the opportunity to try focus stacking butterflies whilst they were in torpor - still asleep early in the morning - if you are very careful not to disturb them too much then sometime you get lucky and manage to photograph a full stack. Its down to luck, the temperatures and weather etc. I find the best time to photograph butterflies and most other insects in early morning, I cannot run around chasing them for photos, so Im better off slowly looking at dawn for roosting specimens.( luckily my partner enjoys photographing them too and has a knack of spotting them which is helpful). It helps if you are aware of the species that are around at different times of year and the plants/trees/habitat they prefer. For instance early spring sees the emergence of Orange tip butterflies which lay their eggs on Cuckoo flowers, as this is what their caterpillars feed on. So if you know a spot where there are Cuckoo flowers then you will increase your chances of finding them roosting nearby.

 Its worth taking along a mini tripod and also maybe a printed backdrop photo or two - just in case the surrounding area is too cluttered and buy to achieve a nice clean image. The stacked image below involved using one of my out of focus backdrops. I did find the butterflies would sometimes move their antennae or wings, or even walk around as the awaken, its just patience and luck getting a stack that is usable.


With insects, if they are still sleepy in the morning and they are not in a position to photograph, it is sometimes possible to place a more pleasing plant just in front of them and ever so gently touch their legs with it, sometimes they will sleepily step onto the new plant, but other times they will wake and fly away. I also carry a tiny pair of scissors with me so that I can snip any distracting elements of vegetation out of the way, providing its not an uncommon plant etc.  Alternatively vegetation can be held out of the way with a clamp, clip or blue tac etc, the aim is to not damage the environment.


Above is another focus stack where I have used one of my printed photographs in the background.

Below is one of my favourite focus stacked floral images this year, it took quite a bit of setting up and was achieved in our dining room, sat at the table. I used an out of focus photo in the background, placed my flowers between the camera and backdrop, then added more flowers behind the main Cyclamen flowers and a few right in front of the lens to get more or a hazy blur. It only took a stack of 18 frames to achieve and is pretty much straight out of camera other than the stacking in Helicon. It was shot at F4. 


I used the same technique for the next two aswell.


As the year progressed I started t try out focus stacking mushrooms, sometimes on location and sometimes at home, creating mini set ups in our home studio/dining room. The more I tried focus stacking on location, the more I discovered I needed extra bits and pieces to my kit, taking along small LED lights, a Gorilla pod, a mat to lie on, foil/reflector, cocktail sticks and floristry wire to help hold things in place. Even with mushrooms the wind can have a detrimental effect so I needed to avoid windy days as this did ruin a few stacks. My first few fungi attempts were at a lovely spot at Wallington hall woodlands, just off the path where I found quite an array of species and pleasing backdrops. Below are two from my first proper attempt at this location. Both required use of a stable mini tripod, a shutter release cable or use of the time function and adjustable led lights to balance against daylight. I found LED lights work better for me than flash, I can take a quick focus stack this way, minimising the chance of movement - with flash there needs to be time between each shot to allow the flash unit to recharge.

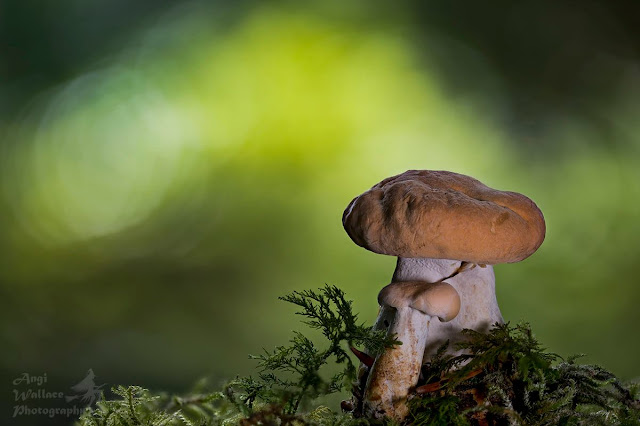

I did take some mushroom specimens home to practice on, only if they were growing in abundance and below are a couple of examples. I wanted to be able to take my time to get everything right at home and add in the faux rain aspect. Im thinking this specimen below  is Lactarius rufus due to its brick red colour and because it was growing near pines, amongst sphagnum moss at Wallington Hall NT, Northumberland. This is a focus stacked image of 80 photos at F4.2 taken on a Nikon Z6 with a 105 macro lens and circular polariser to reduce glare. I sprayed water during one photo to mimic rain.
I used one of my out of focus backgrounds behind it, plus leaves from the woodlands floor to create the foreground haze. Photographed using studio lights. I sprayed water in my final photos and only used one of these in the stack. 
After processing in Helicon I still found that there was some fringeing around my subject which I  had to fix in photoshop - not so easily done with the water droplets, but I have an easy fix for a clear background.

I used pretty much the same  set up for the Amethyst Deceivers below - a stack of 72 images


Below is another set up created at home of Waxcap mushrooms which I had to glue in place ( they are found amongst grass usually), it won a couple of Gold awards with the SWPP and NPS in the macro category.


When shooting focus stacked images outdoors I often find that the background of the final stacked image can be messy due to foliage etc moving in the wind. So once stacked in Helicon I now replace the messy background with one from a single image from the stack - usually fairly easy to do using the select object tool and masking. This also helps to remove the resulting fringeing around the subject. I used this technique in the image below as the out of focus leaves had moved substantially during my stack.

I did find as the months went on that I was attempting more challenging ideas, often taking quite a bit of time to get right. Such as getting mushroom bokeh shapes in the background bokeh and trying creative lighting. This Hedgehog mushroom below really needed a bit of creative lighting to help show off the wonderful details. This was a stack of 65 images and required several lights.

 The image below is a focus stack where I held a mushroom in front of the lens to obtain the mushroom shape in the bokeh 


Then there is this puff ball image, which is a stack of 31 images, composited with the spores from me pressing the backs of the puffballs with floristry wire etc Definitely a technique I need to work on more

So as you can see I have progressed but still have lots to work on to improve, but its a fun journey

I have entered a few of these images into International garden photographer of the year in the mushroom category and the portfolio category. Watch this space for news on whether any get placed


Wednesday, 3 March 2021

Signs of spring

 I love spring, with its ever changing weather throwing snowstorms, rain showers and increasing sunshine, combining to give us rainbows, it seems unpredictable but we know that it heralds the promise of things to come. With frogs starting mating in our ponds, birds displaying comical courtship behaviour and other wildlife coming out of hibernation. The arrival of Hellebores, Snowdrops, Crocuses, Daffodils, Dwarf Irises certainly brighten up February and March for me and give me plenty to keep myself occupied whilst waiting for spring blossoms.

 This year I have discovered a new favourite Crocus -"Firefly" with its fresh colours, a sunny yellow centre and delicate pale lilac and white petals. Who could not be delighted with these?


Whilst its been less than favourable conditions outside for photographing plants in the garden ( too windy) I am taking advantage of our mini studio in the dining room and trying out the new backdrops Ive made, so spoilt for choice with the combinations between plants and backgrounds. This has resulted in experimenting with colour palettes and making some surprising discoveries on what works. 

The image below incorporated 5 of my textures/backdrop images.


Our outhouse has become a great holding zone for plants that are not quite ready to be planted out, or flowers that I am trying to make last longer in a cool room so that I can eek out as much use of them as possible. It looks like a cross between a florists and a garden centre with 3 types of Tulips, Crocus, Snowdrops, Primula, Hellebores, Lilies and more.
 So I am starting out with close ups and aim to include a few still life creations as I go. Below is a Dwarf Iris photographed against one of my new out of focus backdrops.


I actually had my 2nd trip out to a local nature reserve a few days ago, just a couple of miles away from home, so took the camera along too. Unfortunately my mobility scooter decided to choose that day to stop working, so we were not there as long as I hoped. I did capture some spring Catkins though and opted for creating  interesting bokeh with Catkin silhouettes in the sunshine. I think these work nicely in black and white too.


Another subject caught my eye as we passed Bullrushes with their brown velvety heads split, dispersing their seeds in the wind, set against a backdrop of sparkling waters. This gave further options for producing eye catching bokeh. I actually photographed these in black and white for the forms and shapes, but I think they work well in colour too.


 I recently watched a very informative webinar by Guy Edwards on fungi photography, where he explained how to achieve the silhouette shapes within bokeh - something I dabbled with last year and have attempted again, more successfully in the last week or two. This was the perfect opportunity to try the technique, you can see it in the above Catkins images and some of the images below.


 I had a brief play in the garden with the bokeh technique too, it is easier to make it work in larger outdoor spaces with bokeh through vegetation and trees though. So far it seems to work better with a longer macro lens than a shorter one, I think the blur from the item causing the silhouette is too pronounced in a shorter lens, it becomes less obvious using my 150mm. I am keen to try a longer lens to see the results. You can see from  the Grape hyacinth image below how the snowdrop used has caused quite a distracting pale blur. The bokeh was from nearby vegetation sprayed with water, hence smaller bokeh, in a larger open space where the bokeh can be further away it becomes larger, making it a bit easier.


This one is a Snakes head Fritillary using fern for the bokeh. I stuck with F2.8 for the bokeh which wasn't ideal for getting the flower fully in focus, but it was just an experiment  and there were limited options space wise and where the sun hits the garden. Definitely something I will practice more of.


Below I used my Meye Gorlitz Primoplan vintage lens plus an app on my camera which produces rays of light. With a little editing. I have added a selection of other images I have taken in the last couple of weeks.


Sunday, 21 February 2021

Lockdown photography part 5 - In camera Double exposures

 I have been keen on trying double exposures or multiple exposures in camera for a while, but did not have the option on my camera. I recently discovered that there is a downloadable app for my camera (Sony A7ii)) from Sonys website Play Memories that allows double exposures in camera, so promptly downloaded it at a small cost of £3.99.


I was feeling quite excited at using this option because it would allow me to pull together two aspects that I love in one image - firstly getting my main macro subject mostly in focus ( By shooting at F11-18 and using good lighting) whilst adding the soap bubble bokeh ( from a Meyer Gorlitze primoplan lens) which is best achieved wide open at F1.9 with backlighting. The weather outside was murky, dull lighting with winds that would move my subject so I opted to attempt setting up on my dining table rather than in the garden.


 There were several obstacles including having to create my own backgrounds, naturalish look, backlighting to produce the bokeh that I love from the Primoplan lens, then getting the two images to work well together. Plus working at macro photography meant having to be very precise. Then I got silly and decided to photograph a moving subject - my Orchid mantids on tiny spring flowers - giving myself an extra challenge - but then I do love a challenge and both mantids appeared content to explore or preen themselves. I like the option of using current spring blooms for this project with snowdrops, crocuses, mini daffodils and Grape Hyacinths all in bloom this last few weeks.

 The image below has a very light bokeh and I found this was the result with many of my images - using the "screen" mode.

 I did try a few options - using two Primoplan images, or combining one with either a 90mm macro lens shot or a Sigma 150mm macro capture. I was constantly forgetting to change my settings ( switch off flash between images and alter aperture as I was having a major brain fog day  - but kept trying. It was also a good exercise in learning what distances are best in producing the specific bokeh from the Primoplan lens - often it is difficult to find the correct distances in that single image - so you can see why I was keen on double exposures to produce what I wanted.

 The image below was from two Primoplan exposures, one of the snowdrop alone then another of some out of focus Hyacinths covered in water droplets, plus a few more images taken using this method.


I could not resist trying this out with my Red eyed tree frogs using one of my latest backgrounds in red, plus a red flower captured with studio lights at F14 using a Sony 90mm macro lens, with the second image being of the flower covered in water drops photographed with the primoplan lens and macro extension tubes, using led back lighting. 

 The double exposure app has a few different features which I still need to experiment with such as the mirror option used below on my partner whilst he was eating breakfast :D - ( sorry not sorry lol) 


Then there is the soft focus choice which I have yet to try, plus  the reflection and the silhouette possibilities. There is a manual alternative where you can try 6 different blending modes too, viewing the previewed result prior to pressing the shutter.
Below is a quick effort using the silhouette action, my first image was houses out the back and the second one simply plant pots in the garden - nothing particularly creative but an exercise to demonstrate the effect.


Another attempt using the silhouette version resulted in a strange appearance, maybe as the subject was light and background dark - it gave a sort of opposite silhouette look.

 Many cameras do have double exposure or multiple exposure options and some that dont do have an app that can be updated to your camera. Even if yours does not, there are phone apps that can also be used to great effect - so worth looking into and another fun activity to try out whilst we are restricted in leaving our homes. Whilst it is fun to be actually taking the photos and obtaining in camera double exposure, don't forget to try producing these in photoshop by bringing together two images and simply changing blending mode and opacity. I would love to see your double exposures in the comments.

Below is a quick blend of two of my images in photoshop as an example, it was as simple as pasting in the second photo and scrolling through the blend modes to see which looked best, and thats it. 


Chase your dreams as they can come true!

 Its been a while - 10 months since my last blog with several reasons for that. 2024 catch up My year started out great, I was enjoying play...