Showing posts with label lens. Show all posts

Friday, 26 February 2021

Plant and Fungi POTY, SWPP

 Tonight I was awarded Plant and Fungi photographer of the year 2020, from the SWPP, with this being the winning image. Im over the moon.


It was actually a lot of work getting this shot, travelling into woods on a mobility scooter, it was a nightmare getting to the spot. I took a mat to lie down on and LED light panels which I had to prop up using various sticks due to the lay of the land surrounding it. It was a battle to stop glare on the cap, being a slimy mushroom ( a Blue roundhead) , despite using a polarising filter to help. I ad to clean the mushroom stem with a tiny soft brush to remove specks of dirt, and remove distracting leaves and vegetation from surrounding area. I set up using a mini tripod with ballhead, but it was still difficult getting in the right position due to a .slope and the fact that the tripod is fixed size. I used my Sony A7ii plus a Sigma 150 macro lens and adapter. I had to manually focus using peak focusing as it was dark in the woods. I used ISO 50 to keep noise to a minimum, F10 to get the whole mushroom in focus yet still get bokeh from trees and shutter of 1/13 sec - utilising a shutter release cable to avoid any movement. I had one LED balanced but had to hold a second in place due to awkward location.

Here are other images taken at the same session.


Sunday, 21 February 2021

Lockdown photography part 5 - In camera Double exposures

 I have been keen on trying double exposures or multiple exposures in camera for a while, but did not have the option on my camera. I recently discovered that there is a downloadable app for my camera (Sony A7ii)) from Sonys website Play Memories that allows double exposures in camera, so promptly downloaded it at a small cost of £3.99.


I was feeling quite excited at using this option because it would allow me to pull together two aspects that I love in one image - firstly getting my main macro subject mostly in focus ( By shooting at F11-18 and using good lighting) whilst adding the soap bubble bokeh ( from a Meyer Gorlitze primoplan lens) which is best achieved wide open at F1.9 with backlighting. The weather outside was murky, dull lighting with winds that would move my subject so I opted to attempt setting up on my dining table rather than in the garden.


 There were several obstacles including having to create my own backgrounds, naturalish look, backlighting to produce the bokeh that I love from the Primoplan lens, then getting the two images to work well together. Plus working at macro photography meant having to be very precise. Then I got silly and decided to photograph a moving subject - my Orchid mantids on tiny spring flowers - giving myself an extra challenge - but then I do love a challenge and both mantids appeared content to explore or preen themselves. I like the option of using current spring blooms for this project with snowdrops, crocuses, mini daffodils and Grape Hyacinths all in bloom this last few weeks.

 The image below has a very light bokeh and I found this was the result with many of my images - using the "screen" mode.

 I did try a few options - using two Primoplan images, or combining one with either a 90mm macro lens shot or a Sigma 150mm macro capture. I was constantly forgetting to change my settings ( switch off flash between images and alter aperture as I was having a major brain fog day  - but kept trying. It was also a good exercise in learning what distances are best in producing the specific bokeh from the Primoplan lens - often it is difficult to find the correct distances in that single image - so you can see why I was keen on double exposures to produce what I wanted.

 The image below was from two Primoplan exposures, one of the snowdrop alone then another of some out of focus Hyacinths covered in water droplets, plus a few more images taken using this method.


I could not resist trying this out with my Red eyed tree frogs using one of my latest backgrounds in red, plus a red flower captured with studio lights at F14 using a Sony 90mm macro lens, with the second image being of the flower covered in water drops photographed with the primoplan lens and macro extension tubes, using led back lighting. 

 The double exposure app has a few different features which I still need to experiment with such as the mirror option used below on my partner whilst he was eating breakfast :D - ( sorry not sorry lol) 


Then there is the soft focus choice which I have yet to try, plus  the reflection and the silhouette possibilities. There is a manual alternative where you can try 6 different blending modes too, viewing the previewed result prior to pressing the shutter.
Below is a quick effort using the silhouette action, my first image was houses out the back and the second one simply plant pots in the garden - nothing particularly creative but an exercise to demonstrate the effect.


Another attempt using the silhouette version resulted in a strange appearance, maybe as the subject was light and background dark - it gave a sort of opposite silhouette look.

 Many cameras do have double exposure or multiple exposure options and some that dont do have an app that can be updated to your camera. Even if yours does not, there are phone apps that can also be used to great effect - so worth looking into and another fun activity to try out whilst we are restricted in leaving our homes. Whilst it is fun to be actually taking the photos and obtaining in camera double exposure, don't forget to try producing these in photoshop by bringing together two images and simply changing blending mode and opacity. I would love to see your double exposures in the comments.

Below is a quick blend of two of my images in photoshop as an example, it was as simple as pasting in the second photo and scrolling through the blend modes to see which looked best, and thats it. 


Wednesday, 6 January 2021

Lockdown photography - Part 1 Plant life

 Lockdown Photography ideas you can do at home.


As we find ourselves in another UK national lockdown and stay at home order I thought I would try to help motivate others with photography from home/garden as Ive made a bit of an art of doing this in my 14 years of having M.E. I thought I could at least pay it forward with things Ive picked up in my years adapting the way I do photography. Starting with closer up work as that compromises most of what I do. The majority of my photography is taken sat at our dining table with everything I need within reach, to conserve energy.

Macro/Close up - Plants/seedheads/leaves/berries

You dont have to own a macro lens to get up close - you can try macro extension tubes for as little as £20 ( I often use one or two with a 50mm lens or an old Helios lens) or a macro filter that screws or clips onto the end of your lens - I use my partners Raynox 250 and highly recommend it. If you would like to know more about these then do look at my blog post about them. Extension tubes / macro filters blog post You could also look into reversing lenses to get closer.


Plants/seedheads/leaves/berries/branches - from the garden, or snipped whilst on daily exercise, or ordered online. There are so many ways you can photograph plants/flowers/seedheads/pine cones etc - the list is endless - but a few suggestions -
Abstracts
Look for patterns , shape and light, or even colours to experiment with abstract photography


Intentional camera movement - Whilst I use this mostly for trees there is nothing stopping us trying it with plants too.


Backlighting - this can easily be set up at home
Add smoke or mist into your image, using a mini mist maker, or incense sticks, or smoke bombs if outdoors


Use branches, seedheads, berries etc in still life, - I know there arent many flowers in bloom so look for seedheads on your walks - teasels, money plant seeds, pine cones


with reflections ( place in water or on black glass or perspex),


spray water on them, this image is a Pulsatilla seedhead brought inside with water sprayed on


Try a triptych,


Use a light box or lay out your items in a nice arrangement on a surface of your choice for flat lay images, ( I highly recommend pressing flowers and leaves in a book ( or freezing in ice) for future use - especially given the chances that lockdowns may reoccur


Spray leaves/flowers with water and stick them on a window,

Try using shallow depth of field and holding something between the lens and your subject to get a haze/bokeh or place items behind your subject for distanced bokeh ( fairy lights), For the image below I used sparkling fibres blue tacked around the end of my lens which created bokeh as the light hit them.
These two images were obtained by ripping a jagged hole in a sheet of crinkled transparent irridescent material and placing it over the end of my lens


Use crystals and beads in front of your lens to get extra creative effects ( try Lensbaby Omni filters or irridescent materials) The Salvia image below was photographed in the garden with an Omni filter creating the rainbow effect.

This one is taken at my dining table with fairy lights behind


As its winter you could set up seedheads in your garden or on a verge outside by sticking them in the ground and wait for a very frosty morning and capture them covered in frost, or in the snow,


Freeze flowers/leaves in a plastic dish in your freezer and photograph these frozen - maybe backlight them? , or submerge them in water/fizzy water/coloured in a glass dish and snap away.


Or if you have access to one of the vintage lenses such as a Helios or a Meyer optik primoplan , or a Lensbaby lens you could get creative with those. Below are two taken with a Meyer optik primoplan 58 coupled with a macro extension tube


Try spraying water on a stem placed in front of a flower and capture the flower refracted within the droplets. See my blog on the-multiple-personalities-of-plants for more ideas and inspiration, plus kit that is useful.

The images below were taken with an old Helios lens paired with an extension tube ( the lens was only £20)


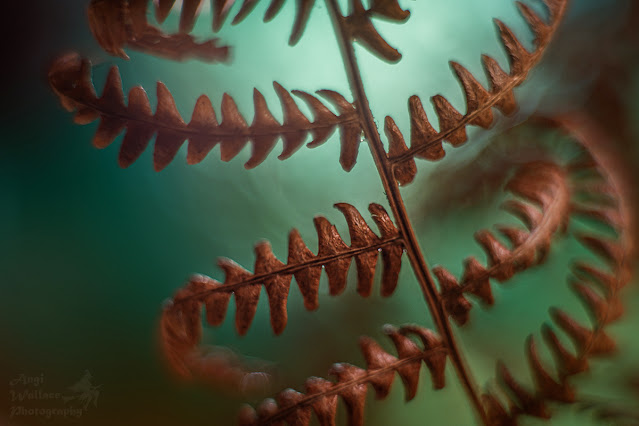
Both of these dead ferns were photographed sat at my dining table with different backgrounds, the top one had a lovely green glass vase behind it and the bottom one had a gold reflector in the background - just use what you have at home - you will be surprised at the results. Or if you want ready made backgrounds there are so many beautiful ones you can but online - Ive produced a large range myself which I print out and place on boards behind my subjects - email me if you would like to purchase some Textures


Add textures to your floral/plant life images - below is an example of my own textures on one image.


Get as close as you can 


Try focus stacking - this image was taken with a macro lens plus extension tubes and a borrowed Raynox 250. camera on a mini tripod, 36 images stacked in a free trial of Helicon software. Its a Tulip stamen, photographed on our dining table.

Photograph insects on your plants


I hope this gives a few ideas to start with, please watch for more to follow in the coming days, staying with macro and close up ideas :)


Chase your dreams as they can come true!

 Its been a while - 10 months since my last blog with several reasons for that. 2024 catch up My year started out great, I was enjoying play...