I have continued to experiment and try to develop my own take on still life photography. This year I have concentrated a lot more on lighting as well as aiming to improve compositions and coordinating the set ups that I create. Yet again I have thoroughly enjoyed immersing myself in this genre and found it a most useful pastime during the months where we were required to stay home more during lockdown. Spurred on by my previous success of a highly commended image in IGPOTY ( International Garden photographer of the year), I yet again aimed high, hoping to get another image placed in the competition this year.
This summer I created a couple of home made Gobos out of cardboard, these are simply a piece of card with shapes cut out so the light and shade hits my background or subject the way that I want it to. I mostly used a couple with squares cut out so it appeared as if sunlight was streaming through a window that was split into squares ( apparently called a Muntin). My challenge was to light by subject in the way I wanted whilst also getting the gobo lit backdrop, all in a small room - this was EXTREMELY challenging, with all sorts of things balanced around the room to keep my Gobo in position, to block the Gobo lighting affecting my still life scene negatively, whilst using Flags to stop light bouncing in certain places and reflectors to help bounce light back into the scene etc.
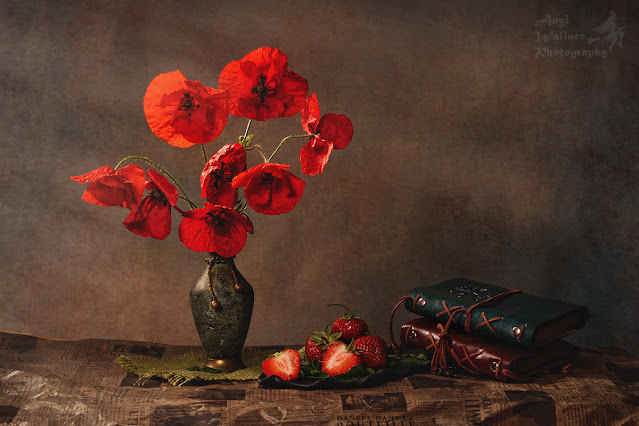
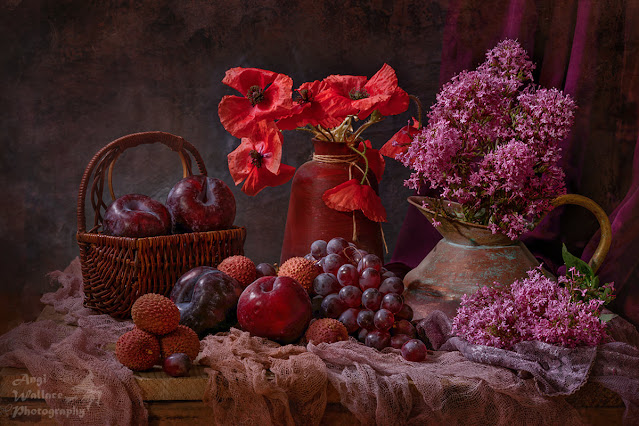
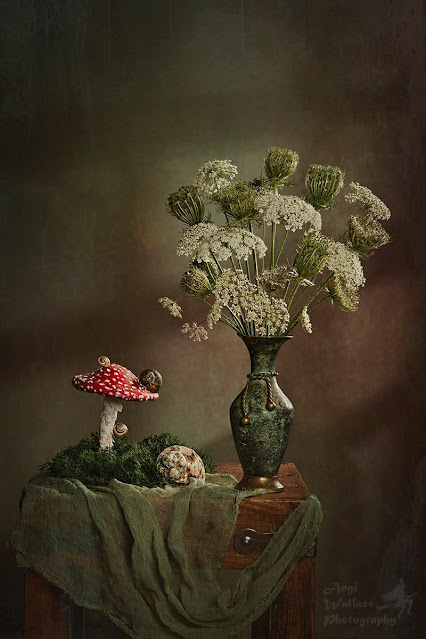
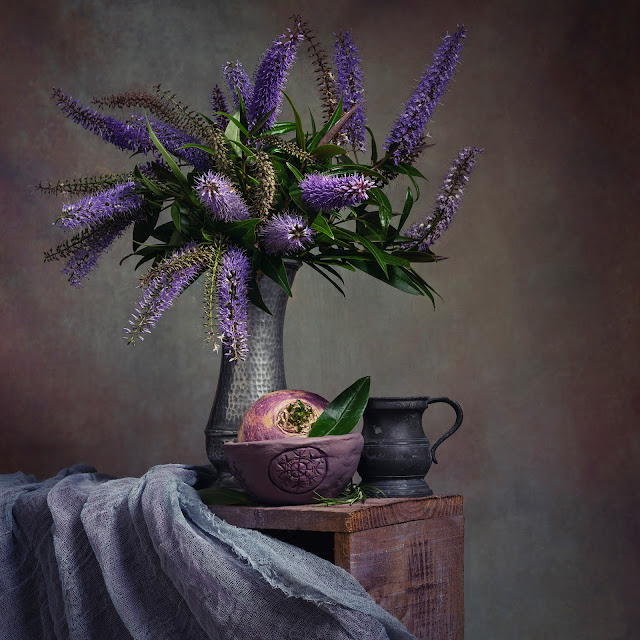
This year I aimed for a bit more of a themed approach to many of the still life images I created, choosing to use mostly wild flowers that most people can obtain easily, many from our own gardens.
My reasoning was to be able to pull together a portfolio of 6 images to enter into IGPOTY and as I am also considering subjects for possible Fellowship panels I decided this could be one of two subjects I would work on this year with the Fellowship aim in mind. Last year we had decided to plant lots of wild flowers in our own garden to help wildlife and the environment, so I had access to quite a few.
I had also built up a small collection of vases, ornaments, dried items from nature, other props plus materials to use in the fore and background.
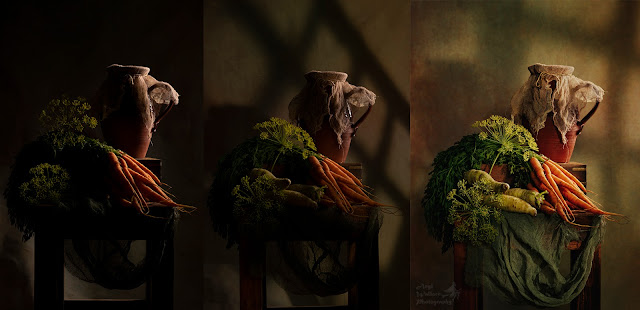
Once I had my set up created I usually found myself starting with adding my first light from behind and to one side of my subject ( even though I only had about 2-3ft of space behind) this was often using a gridded diffuser to keep it directional. This kind of created a little bit of a lift to my subjects, helping them stand out more, but keeping this light coming from the same side as my Gobo so that it would appear more natural. Once I was happy with the light hitting the back and side of my scene, I would add my second light - often through the Gobo. This light needs to be a small source so I used a speedlight, unmodified. Again, space was an issue - I only had about 1-2ft of playing room to move my light within, plus balancing the Gobo in precarious positions whilst trying to keep it outside of the scene. Sometimes I would only use this light to hit my backdrop, other times I wanted it to hit my subjects as well. Even with these two lights the whole scene was often not fully lit how I wanted. For most sets lit this way I needed to introduce reflectors to bounce light back into the shadows and/or a 3rd light. My 3rd light was usually modified with a white shoot through umbrella pointed away from the scene and towards the white ceiling or walls to bounce just a small amount of light in to lighten the whole scene slightly, reducing shadows too. With all the lights it is crucial to note if any are causing unwanted reflections or glare off any shiny, wet, metallic or glass item which can be distracting. In the middle image below you can see a distracting glare on the jug caused by introducing a 2nd light, this was easily resolved by moving the muslin material. Another way to help reduce glare is spraying hairspray or specialised photography spray on the surface - I use a very light spray of dry shampoo sometimes. The series below is an example of how things can progress as I build lighting and sets/composition.
Looking back on last years images compared to this years, I can really see a difference in my approach. Now I am using lighting to focus attention on the details that I want to stand out - at least in many of the images. I will also take a lot more time in creating a set, putting a lot of thought into what subjects I want to use and why, the composition and relationship of the items to each other, the textures, colours, shapes, vessels, materials, background. I am paying attention to the tiniest of details and can sit in our dining room / mini makeshift studio contemplating my scene, changing things around and altering lighting for long periods of time, often leaving it and returning to the project the following day. This suits me nicely, having so little energy, I can spend just a few minutes at a time faffing and rest, there is no rush as little will change over the course of a couple of days providing my flowers are watered and kept well.
After playing around with all the points mentioned above, I did manage to pull together a portfolio of 6 images which I have entered into IGPOTY Portfolio category this year and will eagerly await the results - usually announced in February the following year. I did also enter a few single images into the IGPOTY Still Life category and I was thrilled to at first discover that I had 7 images shortlisted. I was even more overjoyed when the winners were announced!
Imagine my delight when I logged on to the winners gallery and saw one of my images at the top of the page in first place! I was quite surprised and even more taken aback as I scrolled down the winning images to learn that I had images awarded 3rd place, finalist, highly commended and 2 commended!!!!
I was in complete shock - 6!!! images placed in that one category and the overall winning image! I still find it hard to believe. It just goes to show what can be achieved from messing around in your dining room, using flowers that many consider to be weeds. I hope my results might inspire others to try out different genres and entering competitions, if I can manage this as an unwell, disabled person then Im sure most others can too. So here are my winning images :) IGPOTY STILL LIFE WINNERS
Watch this blog to see how my portfolio does in the competition and to see how I progress in pulling together a possible Fellowship panel ( also see my next blog on Fungi photography - the other subject I have concentrated on for a possible panel and entered into IGPOTY)


