Showing posts with label macro lens. Show all posts

Wednesday, 19 April 2023

Focus stacked 3D Stereo pair images - A possible game changer for macro photography?

  After joining the Allan Walls macro community I became aware of stereo imaging due to a challenge being set and a great introductory tutorial. So I threw myself into a new challenge as its just the type of photography I can do from home when Im not managing to do much.

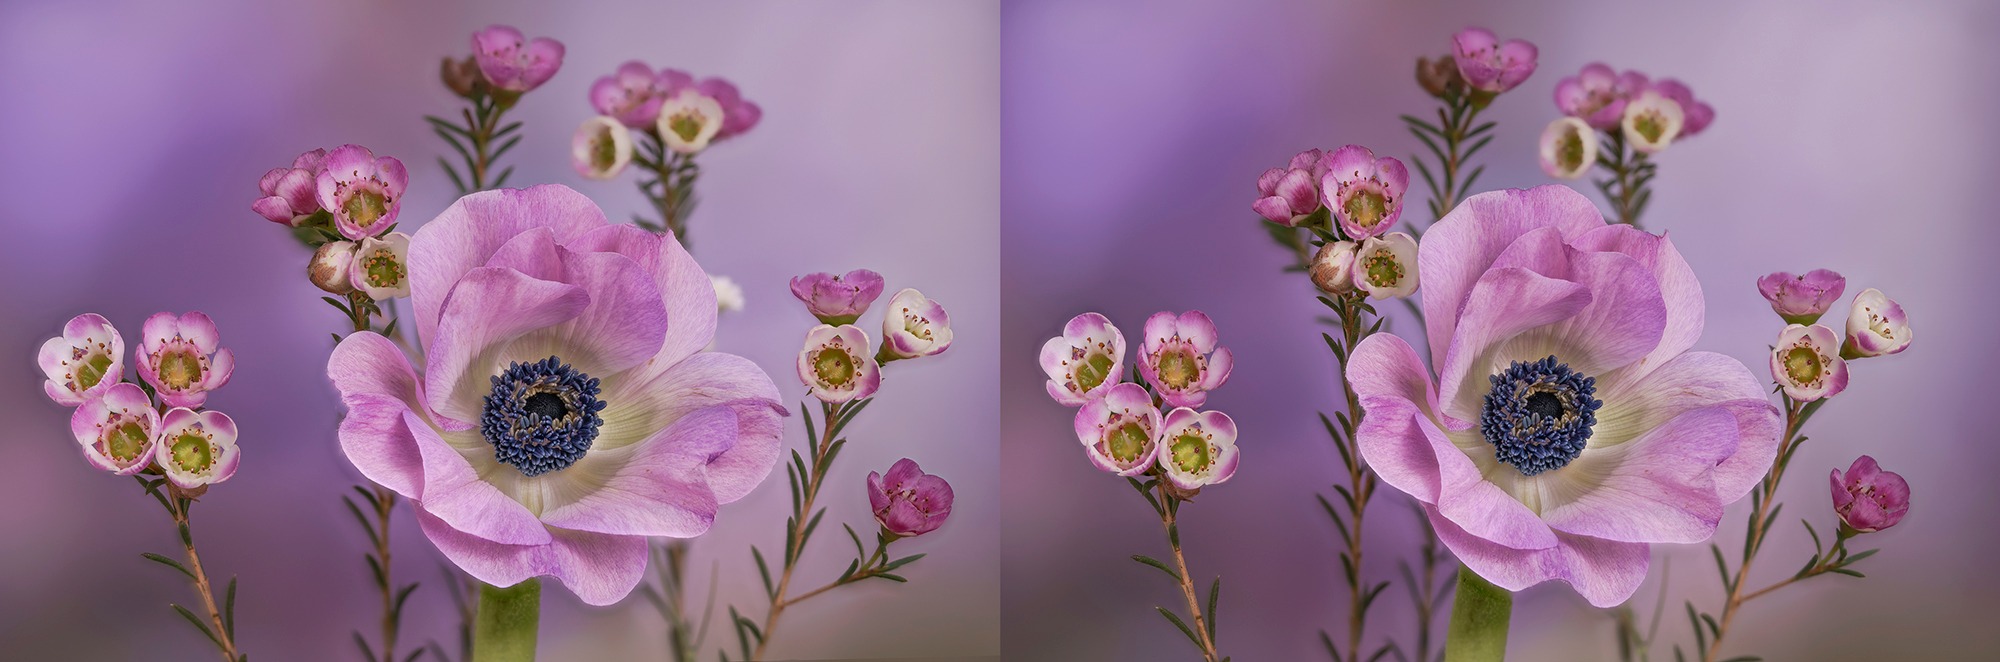
To start with I tried photographing 3 focus stacks of the same subject - ( a taxidermy insect specimen or flower) where I rotated the subject aprox 4-8 degrees between the stacks. When viewed side by side this should produce a 3D image and I was pleasantly surprised when my results paid off very quickly. Although at first I was unaware that if the images are placed in the wrong order the 3D image can appear as if its going away from you rather that the  goal of it coming towards you. 


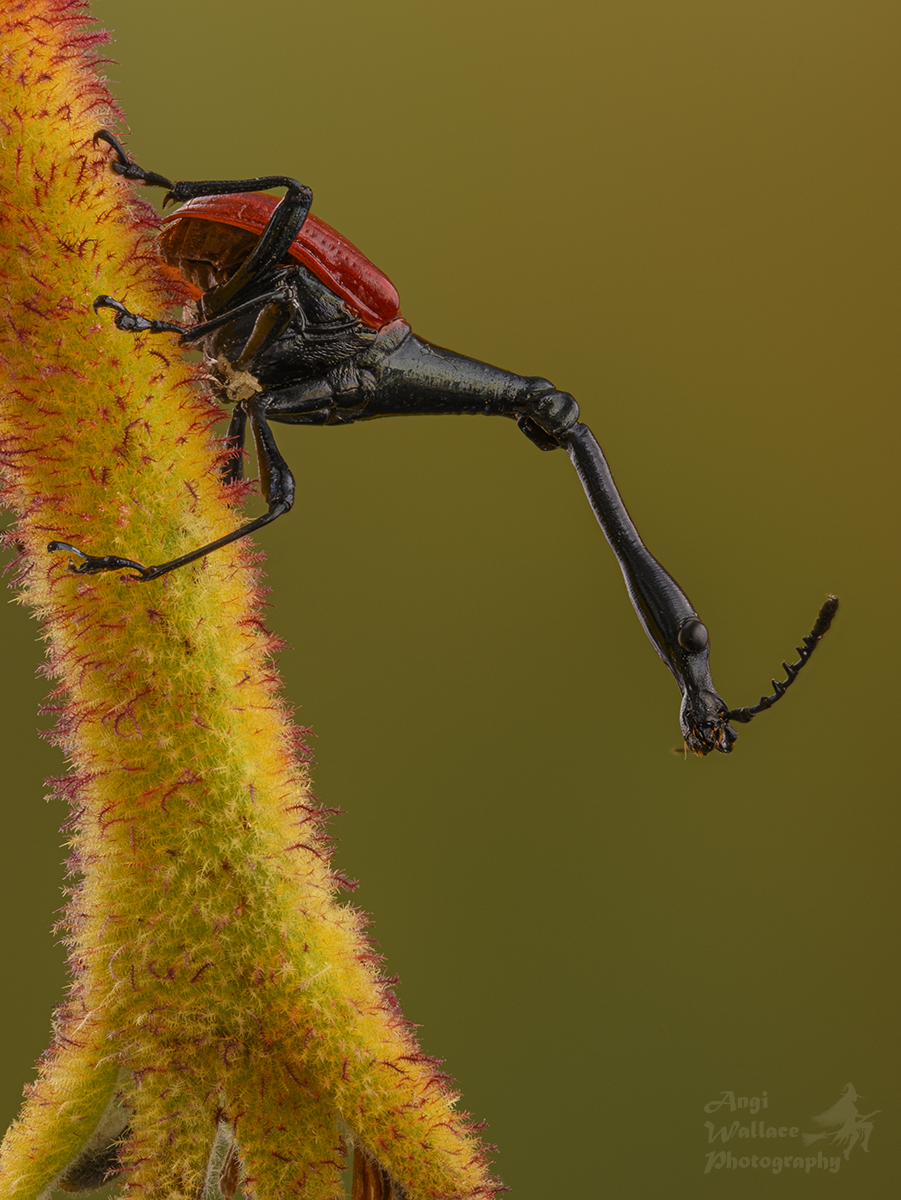
Now getting everything prepared, set up, lighting right, the focus stacking done correctly, then the lengthy process of stacking images in appropriate software followed by finely detailed editing to ensure each image is edited precisely the same is not for the faint hearted. I have had to learn about taxidermy insect specimens, where to obtain them, how to clean and relax and position them, followed by the fiddly process of setting them up for photos. Then the lighting  can take time as many of these subjects can be super shiny, requiring several layers of diffusion material to avoid specular highlights, plus mini reflectors made from foil to lighten up the areas light doesnt reach. All this within a very tight space, often with the lens within  inches of the subject.


I have now changed from using Michaels Z6 and using my own Sony A7iii on my new WeMacro automated rail which I do prefer for focus stacking - this is controlled on my phone. I feel that almost all my focus stacking works well with this set up, where previously I often had errors in the stacks.

I am using a variety of lens but mostly my Sony 90mm macro lens, sometimes with extension tubes, and sometimes with a Raynox 250. My other main choice of lens is my new Canon MPE 65 MPE, which is taking a bit of getting use to, but is giving me great results. This requires an adapter to fit my camera and I have had some minor issues with connectivity, but Im persevering.


Now that I have had a couple of months practicing the techniques I think Im ready to attempt getting more adventurous with my set ups and will try to add in more depth, using both insects and layers of flowers. Ultimately I want to do this to give lots of depth and interest, loads of details but whilst retaining some of the out of focus bokeh that I love. So its a journey to see what I can create. 


If you are new to stereo photography I will warn you that not everyone is able to view these easily, some people can only see the 3D image with a 3D stereoscopic viewer. I'm very lucky, I can easily defocus my eyes and see most stereo pairs within seconds.  At first I found that crossing my eyes and bringing the images closer to my eyes then very slowly moving the images away, helped me to see the 3D version. Sometimes I find it easier on my computer, sometimes on my phone. 


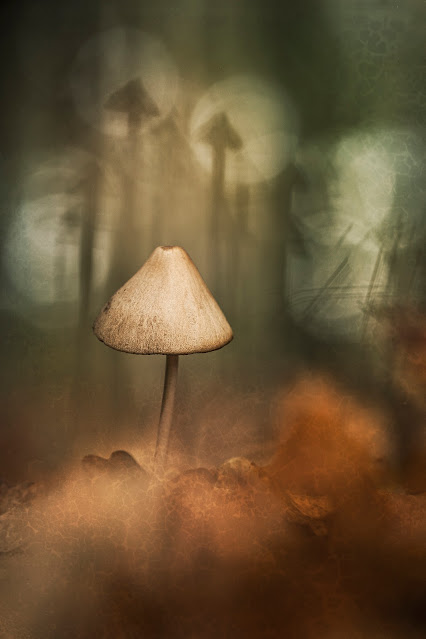
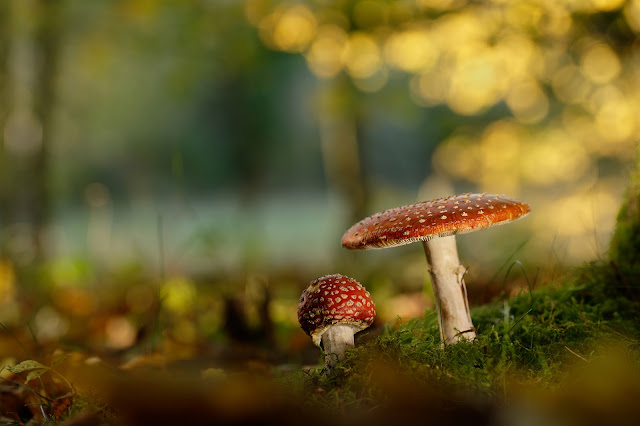
What I love is seeing macro images that 2-5x life size as stereo pairs as these show depth and detail like I have not seen before, this excites me and is what is pushing me to create more.

I have since come across Brian May's website where I am learning a bit more about this genre, here he encourages people to try creating stereo pairs using mobile phones and a dedicated app - something I intend to try soon. I have purchased a pair of his owl viewers but neither my partner nor I can see the stereo images using these. His websites contain many other useful links and I am working my way through these to learn more. I've not found many photographers using this technique in focus stacking macro photos, but hoping to soon as it will be good to connect with more who are interested in it. 


As for editing the pairs of focus stacked images - this can take hours if the insects are not pristine. If they are not edited identically this can throw off the stereo effect and it just wont work properly.

Watch this space for more this year as its a project I intend to work on all year. I would love to hear your thoughts on this project and any suggestion in the comments or in a message on social media. - EDIT a couple of days after writing this someone suggested that it may be easier for people to view the 3D images if I presented them as 3 images and yes, more people who could not see the 3D version with two images can now see them for the first time. So at the bottom I have added the triple image versions. 


Friday, 3 February 2023

2023 Off to a good start

 Well its only February and 2023 has certainly got off to a great start photography wise for me. 

Michael upgraded his equipment last year and kindly gave me his Z6 which has the fantastic focus shift feature, allowing focus stacking. He had let me use it frequently over the last couple of years, but this last month I have really concentrated on focus stacking in my mini home studio ( dining room/table). I bought a couple of insects to practice with, used some flowers and other objects too. I was directed to a fantastic macro photographer youtube channel, full of excellent videos giving information on pretty much everything you could ever need to know to get started in macro focus stacking. Namely Allan Walls photography. I ended up watching the videos most days this last few weeks and joining the new livestreams. Despite having done macro and close up photography for 17-18 years, I have learned loads through this channel and put a lot of it into practice already. 


My aims in improving with focus stacking are to use it creatively, like in the Astrantia image above, combining it with creative effects in camera, and using creative lenses. Secondly is to get more into extreme macro - such as  x2 -x 5 life size and see how I get on with that. 

Now I was really over the moon and grateful to have the opportunity to use the Z6 for focus stacking. However, I had some great news this month in winning both 1st and 2nd place in the Camera Jabber photographer of the year competition and this has allowed me to add in some extra gear ( I will also sell some as the prize - £1500 voucher to spend with MPB -  didnt have the main piece of equipment I wanted) So I treat myself to an automated focus rail - the WeMacro rail, after watching video reviews on it. This allows me to use my Sony camera and all its lenses, meaning I can get more creative. I have also got a Canon MPE 65 macro lens coming as part of my prize - this allows up to 5x life size. So I will be able to really  focus on the macro side of things this year. Im feeling super lucky and grateful in winning this competition. 


I ordered some ethically sourced taxidermy specimens to photograph and Im slowly learning how to relax them, position them and photograph them. Ive ruined most of them already, breaking feet or antennae off, but its all part of learning I guess. Above is a Giraffe beetle, quite fascinating - as so many of these insects are. Its a whole new world photographing insects.

Ive had to learn new lighting techniques to help avoid glare and hotspots on shiny subjects such as beetles and small products such a jewellery, so its a great learning experience. I've been using extra scrims and flagging more, aswell as reflecting light a lot - all techniques I use for still life - but in slightly different ways. Its not coming easy with my brain fog, but I leave everything set up constantly and often enlist Michaels brainpower when I get stuck or forget things/ cant work something out. Even photographing something that might appear simple like these beautiful earrings given to me by my daughter, has been helped by employing my new knowledge and growing macro skills. 

Ive had more exciting news this month too, I have 3 images shortlisted in the SWPP Photographer of the year awards - 2 in the macro category and one in In camera artistry. The results are out in March.

Also, I was thrilled to have an image Highly commended in the Beauty of plants category and another in the Abstract category of International garden photographer of the year. So thats a total of 6 images placed in al the categories for 2022. Its worth taking a look at their website as the winning entries are quite wonderful. My favourites are the winning portfolio by Barry WEbb of Slime moulds - something I am keen to try myself once I improve with closer focus stacking. 

Yet another competition result was with the WPE - I had completely forgotten that I had entered 3 images and was browsing the winning images when I discovered I had won first place and Gold medal in flowers and two silver medals in macro. So its been a bit of a crazy month competition wise, funnily enough I had been considering pulling back from competitions and entering less, now Im not sure. Ive stopped entering a couple, but will have a think on whether I really want to enter so many. I do enjoy entering some and it pushes me to improve. So I will likely still enter my favourite subjects of macro/close up and flowers. I have entered a bit of a fun image into Allan Walls photography's macro mineral competition and funnily enough got it highly commended with the SWPP - it wasnt a serious entry but more fun. See below.


This last week I treat myself to some of my favourite flowers - Anemones - Blue mistral and Nero, and Ive been learning how to use the WeMacro rail whilst photographing these. I have some pastel Anemones coming next week - something Ive not been able to get hold of for many years. One good thing is that it doesnt use much energy as everything sits on a tripod, so easier to capture images in a way. Ive loved getting images like the one below with the centre in focus and still lots of nicely blurred out of focus bokeh. 


So anyone following my photography will be seeing lots of beetle and flower photography popping up and hopefully will see some improvements in my macro work. 
I also have two lensbaby lenses coming as part of my prize from Camera jabber and MPB which I am excited to use in focus stacking too. Lots to keep me occupied with macro at home whilst Im not managing much physically, although I really am hoping to get out to photograph Snowdrops, Crocuses and other spring flowers asap.


Thursday, 3 February 2022

In the news... IGPOTY Portfolio finalist, CUPOTY results and Amateur photographer article.

  Happy news today, on my second year of entering the Portfolio section of the International garden photographer of the year ( IGPOTY), I have managed to get a finalist position. I am thrilled with this, even more so as it is judged by the esteemed Royal photographic society ( RPS). Totally over the moon. What is also lovely is that it is a still life portfolio, a subject which I put a lot of time and effort into trying to improve and learn this last couple of years and hours pondering which to enter. 

 I also managed to get an image placed in the new Fungi category, which is very pleasing as its yet another subject which I have endeavoured to improve upon recently

So here is my fungi image, a strange one as I added textures to it. The mushroom shapes in the background bokeh were created by a tiny mushroom between the lens and the main mushroom. I added my own textures and edited it using Exposure 5 software for a bit of a different feel. Lovely to see fellow photographers Tony North and Barry Webb ( Barry produces the most fascinating macro shots of slime moulds) doing so well in this category too, check them out here -Fungi results


So I can now finally share my still life portfolio with you all. It was a project I embarked on partially in a bid to focus on learning how to light still life images better and also on bringing the beauty of wild flowers indoors - quite a personal one for me as I find it too exhausting photographing outdoors due to having M.E., so adapted to creating something indoors where I can take my time and sit down as much as I need. This is another example for all those who say  that they cannot get out to take floral photos, all the flowers were obtained very near our home ( literally in our garden and our street for some)

I wanted to showcase the beauty of wildflowers in still life settings. These days it is more common to see vases full of flowers bought at florists, but I prefer to enjoy wildflowers in a style similar to the Old Masters’ paintings, with light cascading across them. So, I set out to produce a collection of still life floral photographs, using my own interpretation of the classic still life style.

All plants used were local to me, mostly growing in my garden, a nearby garden, or wasteland. They include; rosebay willowherb, purple loosestrife, salsify, chamomile, dill, and buttercups.


This first one is Rosebay willow herb which has fabulous shapes, like tentacles reaching out.

Purple Loosestrife from a wild garden at the end of our street provided a bright splash of purple spikes to contrast against the greens of the vegetables from our local farm shop in this image.

These incredible Salsify seed heads from our garden were screaming out to be photographed, I felt they complimented the wildness of a mini faux birds nest and look quite special adorning  this decorative pewter vase. With subtle colours and creative lighting they pop nicely.


This lovely bunch of Chamomile is a sight I will not see in the same spot again as it is now been used to build houses upon, so it is quite fitting that they have a special place in my local wild flower project.

Wild Carrot or Dill? I am still not sure -  reply with your answers :) Nice vibrant flowers with intricate shapes.


The much over looked humble Buttercups with more Salsify feature with a kind of farmhouse table look.

 I hope you all enjoy my still life portfolio as much as I enjoyed creating it. The lighting was quite tricky in a small room and mostly featured 3 or 4 lights, with reflectors and home made Gobos. Quite time consuming to get it all just how I wanted it as even a slight shift of an inch or two made massive differences to how the light fell.

Do check out the other truly jaw droppingly beautiful portfolios that were placed and the other wonderful images from so many talented photographers in the rest of the categories. I absolutely adore the 1st place image. IGPOTY winning portfolios

In more good news, this week saw the publication of an excellent article ( in Amateur Photographer magazine ) written by the very innovative photographer, Tracy Calder, about mindfulness and photography, an approach I whole heartedly believe can help many people. Tracy kindly put my name forward for inclusion in the subsequent article which was superbly written by the lovely Geoff Harris. Geoff rang me for a little chat about the part photography has taken in my life, my struggles to actually manage photography with the symptoms of M.E. and benefits of using photography as a coping strategy. Its a great read with eye opening interviews from others who have employed photography as a tool to help themselves, its a sensitive subject and handled so well with Geoff's thoughtful and compassionate writing. Worth a read.


Today also saw the results of Close up photographer of the year's Two of a kind challenge. I was lucky enough to have two images make the stunning shortlist. Very chuffed to say that my image of the two Cyclamen made it to the gorgeous finalist selection. CUPOTY TWO OF A KIND WINNERS

This is one of my favourite images taken last year, sadly I can no longer reach this spot on my mobility scooter as it has been devastated by two storms within 2 months, with trees uprooted and hanging precariously. The paths are blocked for the second time in 2 months and I am told that the park is in a much worse state now. So this image is even more special to me, capturing a treasured spot where I practiced mindfulness for the last 2 years during the pandemic. Its a happy image, but tinged with loss of a much cherished woodland habitat.

Above "The Kiss" exquisite, delicate form and shape mixed with romantic pink ethereal haze in this portrait of winter Cyclamen.

A selection of images and tips from winners is to be published in Amateur photographer magazine next week, which could be interesting for those who enjoy a bit of close up imagery. ( I think I should get a commission for plugging a certain magazine this week! :D )

Now I have a question to ask you all, what would you like me to blog about on here?


Thursday, 4 March 2021

Textures how to use them and how to make them

  I adore seeing images with painterly, ethereal appearances, where photographs and textures are carefully meshed together to create a masterpiece. I have dabbled with using textures in my imagery ever since I started getting into photography. Firstly, the son of a friend helped me to learn how to create digital signature images  for use on internet forums around 18 years ago. After this I practiced blending layers together to create signatures tailored to individuals, then moved on to creating textures for my photographs. 

 Below are a couple of  my old photographs where I first used textures. You can see they are quite basic, but the sunflower one remains an old favourite. These are both from around 2008.


The next images show how my blending and layering techniques evolved over the following years as I learned from fellow photographers on Ephotozine and DeviantArt. Most of the textures I used then were free downloads off DeviantArt, Flickr, Ephotozine and similar sites.


As you can see I started out my photographic journey capturing flowers a lot, something which I have recently got back into. But I also used textures with other genres such as portraits.


 As I started entering competitions I discovered that it was important to use my own textures in my digital manipulations in images that I intended on entering to certain categories/competitions. So I started learning how to create my own textures. I first started by painting some card with watercolours then photographing those. I also photographed various textured surfaces such as walls, stone, wood, paper and manipulated these in photoshop.  I still have the painted textures and sell these as one of the texture packs that I have put together. 
 
This was one of the first textures I made, which was originally from a photograph of a stone quarry near where I lived. 


This is one of my latest texture collections - I have many available, a lot available on my Deviant art stock account A68Stock  or in my Etsy store AngiWallaceCreative Etsy store or by contacting me directly on Facebook Angi Wallace Photography,  or by email - angiwallace@live.co.uk


This image of a Crocus was created with just one of my own textures, I altered the colour of the texture to get the glowing blue/lilac colour that I wanted.


So how do I use textures? 
If new to textures - To use in photoshop ( Ive started with basic simple instructions for those who are new to using textures)
Open the photo or artwork you wish to apply your texture to
Then also open the texture you wish to apply, with this texture open click on Select then All, then click on Edit at the top of your work space and choose copy from the list,
then go to the photo you are applying it to, go to Edit again and choose paste. Now you will see the texture appear over you photo. So below you see my original photo open in photoshop.
You should have a Layers panel open ( mine is bottom right of the screen) where you can see both layers in a panel - each layer will have an eye icon next to it for you to choose whether you want it to be visible or not. Your photo will automatically be named Background layer and the texture will be named Layer 1 unless you choose to alter the name. In this Layers panel you need to click on the texture to choose that layer - this will highlight the layer within the panel - so anything you do following this will apply to that layer.

Within the layers panel you will see a dropdown list starting with "Normal" - this list is of blending modes - in the Newest version of Photoshop you can hover over each blending mode and it will show you a preview of how that blending mode will affect the layer, each will give it a different appearance. Scroll through these and find which blending mode you prefer and click on it - it will be applied to your texture layer giving the image a different look. 

Also within the Layers panel there is an Opacity option where you can reduce the opacity of the layer for a more subtle look. I often reduce opacity.

 I find it useful to select areas of the texture, feathering it and reduce the opacity by using masks, this is particularly handy when you want a particular subject in your photo to show throw more prominently.
To start this process you will need to choose your texture layer by clicking on it in the layers panel - you will know you have done this right when the layer is highlighted in a lighter grey within the panel. Then click on the Layer mask icon  at the bottom of the Layers panel ( it is the white rectangle with dark grey circle within) When you click this a white rectangle will appear in the Layers panel next to your texture - this is your "layer mask". It will be surrounded by white corners showing you that it is selected. See below screenshot.

What is a layer mask?
Basically whatever part of your mask is white is what you can see of that layer, whatever you paint in black  using the brush tool over your image will be removed from view. So in my image I want to see the bottles and flowers with less texture on them. I start by loosely selecting the area around them using the lasso tool from the top left of your tools. Do this by drawing around your subject and you will have an area selected by flickering with dots ( often called marching ants). 
Now because this is the area we want removed and we do not want a harsh line of where texture starts and ends, we are going to feather the edges of this selection. This will help give the image a better blended appearance when finished.  So go to "Select" in the top options and scroll down to "Modify" and another few options will appear - choose"Feather". A small box will appear asking how many pixels you want to feather by. On my first layer for a full size hi res image I tend to start by feathering a lot, so chose 300 pixels for this image. type in your chosen number and press ok. The selected area surrounded by marching ants will shrink a bit. 

Next we need to fill this selected area with black. Make sure in your layers panel that the texture layer is highlighted grey and the mask has the white corners. Then from the top options choose "Edit" then "Fill". A new box will appear asking what colour - we want black. Also what percentage, I choose 50% for my first layer as I remove more in my  next layer. Then click ok. Then click Select and "Deselect to get rid of the marching ants.  
For this image I am using a normal blending mode so had my opacity reduced to enable me to see  the bottles and flowers. Now that I have masked out my first area I can change my opacity back to 100% to get an idea of how it is looking. As we can see below there is still some texture over the bottles/flowers.


Following the steps above again we select smaller areas and feather these a lot less - say 100pixels, so starting with the bottle on the left I select an area smaller than the bottle itself. ( again make sure the texture layer is selected and the mask selected before filling this area with Black at about 75% this time. Deselecting and repeating for each bottle and flower. If something is very small then feather less pixels.  Soo after masking these little areas my image looks like this below.

You could your image like this  or mask out less than I have, this is totally up to you and depends on the look that you want. But for a further step, if you want texture removed accurately or completely from some areas then choose the brush tool on the top left and choose the colour black to paint with - checking the size of brush, whether it has a hard or feathered edge and also the opacity. Making sure your texture layer and mask is still selected you can start painting over the areas you want to see more of such as the flowers, using your brush. I often start with a lower opacity and build this up.
Below is my final image and you can see my mask in the layers panel showing the darker areas of texture I removed. This is just one of the ways I apply textures. There are other approaches too. You can use several layers of textures to build up your look. You can automatically select your subject in newer versions of photoshop or use the "select and mask" option, but this can leave harsh edges between your subject and texture which may not be what you want. There are also other options for refining edges. But this is just a basic starting point for those who have asked me. Please to get in touch if you have any questions and I will try to help


Other examples of my images with my textures applied below 

I should add that I use a Wacom tablet for all editing. I find it easier to select and paint areas and find it invaluable for editing. I have used Wacom tablets for over ten years after winning one in a competition and wont be without one now. 


I have been asked many times how I produce my textures and my techniques vary. The two textures above were simply photos taken at home - Chalkboard was a photograph of a set up for still life, where I painted an old board at home with black matt paint then sponged on white and grey areas, photographed deliberately out of focus for this effect. The second one is a similar painted, textured board simply desaturated with colour changes.
I often take photos that are deliberated out of focus to use as colour wash textures or to combine with a photograph of a textured surface. 90% of my texture photos are taken at home or in the garden. For out of focus textures I can use anything from flowers, grass and foliage outside, to the sky, a glass vase, material on clothing, curtains, bedding, bokeh from fairy lights, our fish tank etc Only your imagination stops you coming up with ideas here. For surface textures I can use standard photographs or macro photos of virtually any surface in the house - cracked leather on an old seat, crinkled paper stained with coffee, marble works top/fireplace, floor tiles, carpet, various material,l leather on boots and bags, lichen on a plant pot outside, a rusty old bolt, an old baking tray, bottom of a pan, walls, bricks, any painted surface, wood. The images below are simple snaps at home that will make wonderful textures/overlays.

This one is a simple out of focus flower photo which I have already used as a backdrop of overlay.


I find that combining my photographs helps in creating new textures, using blending modes, opacity and sometimes distorting them. Another tool I use is Topaz studio software which has a whole host of options for manipulating your images, many of which can give a lovely painterly appearance. You can download a free months trial to try it out. 


If you don't have the inclination or time to create your own textures then I have lots of different texture collections for sale starting at just £8 for a collection of 9 or 10 hi res textures.
They can all be found on this website Angi Wallace Creative Textures , but unfortunately cannot be purchased there yet as I am not earning enough from them to cover the cost of using the website as a shop. If I start to sell more then I will hopefully be able to make them available this way. In the meantime please email me and I will usually respond within hours. angiwallace@live.co.uk

I hope this has been helpful and would love to see your results. 


Chase your dreams as they can come true!

 Its been a while - 10 months since my last blog with several reasons for that. 2024 catch up My year started out great, I was enjoying play...