Sunday 13 November 2022

Adapting with photography this year

 So this year over all I have managed less than half of what I would normally manage photography wise, simply due to reduced strength, stamina, increased M.E symptoms, brain fog, etc. Its not just that I have struggle to physically take photos, but brain fog has been severe most of the year - meaning I often cant remember simple things that I know fine well how to do, such as settings, composition, correct lenses and approaches/techniques. Its very frustrating. Then when I do manage very limited short, minimal energy use photography - I suffer for days afterwards. So I have had little choice but to cut back and be strict, look after myself and pace all of my activities to try to reduce my M.E symptoms and improve my health. Even editing has been a struggle, also made worse as my eye sight seems to be worse - so Im planning a new eye test to see if I need new glasses.

So I have not focused so much on taking photos for awards this year, although I have managed a few simply sat in our dining room. 

I have had some good news this year, winning NPS photographer of the year for last year, which is a huge honour and I am amazed to do so - I look at other entrants images and always see work that is much better than mine, but think maybe its down to the volume of entries and consistency that helped me to win.


So I tried some abstract ICM ( Intentional camera movement) images using materials laid out on the floor whilst I sat in a chair, I quite enjoyed doing this and was able to produce some that appeared like ICM landscape images with careful arrangement of fabrics. Its a lot of trial and error but fun to do, I even won a couple of awards with these. 


I particularly love this one below which feels very much like a beach scene with grasses - I placed some faux fur where I wanted to grass look and a see through voile in layers for the "hills". 


I have also played around with creating abstract images from ICM shots I had already taken outdoors, producing several layers for multiple exposure editing. This one below was an ICM of some Silver Birches at a local park, where I duplicated the image plus another from the set and distorted it to use as extra layers with different blending modes. I shared this one with the lovely Molly Hollman ( wonderful floral photographer Molly Hollman photography) and she advised me on a tweak, which I tried out and it improved the image massively, it was just awarded Gold by the  NPS, so it just goes to show what you can produce despite being unwell. Ive added to original ICM of Silver birches as well for comparison.


Molly and I both enter a few of the same competitions ( IGPOTY, SWPP, APOTY etc) and its been lovely to have a friendship grow as a result, where we can help encourage and advise each other.  I adore her work - do check it out in the link above. Recently we managed placements in APOY close up round, with Molly coming first and me second.  Check the results  out here APOY close up results

I had hoped to photograph lots of still life photos this year, and whilst I did manage a few, I did not complete any of the specific projects that I have started - which I intended to use as portfolios entries in IGPOTY etc, so I will simply continue with this when I am able. I was truly astounded to be awarded first place in the IGPOTY still life category this year, as well as two commended, I cant believe that I have won this competition for two years in a row - bonkers. Funnily enough the winning image and commended ones where ones that I really did not feel would do well - just shows what I know !
 Here is a link to the winning images, I particularly love Marion Buccellas images.
 Below are some of my favourite still life images Ive produced this year, I went through a spell of creating images with shadows lighting using home made gobos. 


I also had some success with the IGPOTY macro category, coming third with the image below, which really blew my mind as Peter Sabol ( Peter Sabols website  was first place and he is one of my favourite macro wildlife photographers, and Tony North ( Tony Norths website ) came second, someone whose work I really admire, especially as he excels in many genres. Do check out the results and look these photographers up. IGPOTY macro project winners


I was thrilled to get a gold award for a macro image taken at my dining table - focus stacked using Michaels Z6 - with both the SWPP and NPS. Im hoping to take more like this - although the dining table is currently set up for jewellery making :D, so it will have to wait.


Ive really missed getting out taking photos of mushrooms this year, Ive tried 3-4 times but simply wasnt managing. Finding fungi whilst exploring on a mobility scooter isnt easy, terrain  is super bumpy and difficult on a scooter and it takes every scrap of my energy just getting round many woodland trails. so by the time I find a good specimen, trying to set up with lights, get good composition and settings right - despite lying down, was absolutely exhausting and each time Ive attempted it I was beyond exhausted extremely quickly. It takes a lot of effort and concentration getting things spot on and I simply did not manage at all, and had to give up rapidly, still with severe M.E. symptom payback for days afterwards. Its hard not being able to do what you love, and fungi photography is way up with my favourite subjects. I love being out in the woodlands, especially when there is nobody around, I love the trees, moss, fungi, just being in nature. Im sure I will get back to it as my health picks up at some point. My favourite local nature spots with decent paths have been inaccessible since storm Arwen, but they are finally starting to clear the paths now, unfortunately we have to wait until spring before certain paths are properly accessible for mobility scooters - something to look forward to. 
I did find the fungi below and these two are pretty much all Ive managed this year, which is better than nothing. Parrot waxcaps are amongst my favourites. 


So its been a strange year for me photography wise, but as always I will adapt and do what I can whilst my body and brain arent playing ball, and I will be grateful what I have and can do, even if I am restricted, there are always those worse off. I have a new blog now where I will add my creative journeys with art, crafts and jewellery making - hobbies I have turned to that take less energy, stamina and concentration ( sometimes) to occupy myself whilst Im not managing photography. 


Thursday 3 February 2022

In the news... IGPOTY Portfolio finalist, CUPOTY results and Amateur photographer article.

  Happy news today, on my second year of entering the Portfolio section of the International garden photographer of the year ( IGPOTY), I have managed to get a finalist position. I am thrilled with this, even more so as it is judged by the esteemed Royal photographic society ( RPS). Totally over the moon. What is also lovely is that it is a still life portfolio, a subject which I put a lot of time and effort into trying to improve and learn this last couple of years and hours pondering which to enter. 

 I also managed to get an image placed in the new Fungi category, which is very pleasing as its yet another subject which I have endeavoured to improve upon recently

So here is my fungi image, a strange one as I added textures to it. The mushroom shapes in the background bokeh were created by a tiny mushroom between the lens and the main mushroom. I added my own textures and edited it using Exposure 5 software for a bit of a different feel. Lovely to see fellow photographers Tony North and Barry Webb ( Barry produces the most fascinating macro shots of slime moulds) doing so well in this category too, check them out here -Fungi results


So I can now finally share my still life portfolio with you all. It was a project I embarked on partially in a bid to focus on learning how to light still life images better and also on bringing the beauty of wild flowers indoors - quite a personal one for me as I find it too exhausting photographing outdoors due to having M.E., so adapted to creating something indoors where I can take my time and sit down as much as I need. This is another example for all those who say  that they cannot get out to take floral photos, all the flowers were obtained very near our home ( literally in our garden and our street for some)

I wanted to showcase the beauty of wildflowers in still life settings. These days it is more common to see vases full of flowers bought at florists, but I prefer to enjoy wildflowers in a style similar to the Old Masters’ paintings, with light cascading across them. So, I set out to produce a collection of still life floral photographs, using my own interpretation of the classic still life style.

All plants used were local to me, mostly growing in my garden, a nearby garden, or wasteland. They include; rosebay willowherb, purple loosestrife, salsify, chamomile, dill, and buttercups.


This first one is Rosebay willow herb which has fabulous shapes, like tentacles reaching out.

Purple Loosestrife from a wild garden at the end of our street provided a bright splash of purple spikes to contrast against the greens of the vegetables from our local farm shop in this image.

These incredible Salsify seed heads from our garden were screaming out to be photographed, I felt they complimented the wildness of a mini faux birds nest and look quite special adorning  this decorative pewter vase. With subtle colours and creative lighting they pop nicely.


This lovely bunch of Chamomile is a sight I will not see in the same spot again as it is now been used to build houses upon, so it is quite fitting that they have a special place in my local wild flower project.

Wild Carrot or Dill? I am still not sure -  reply with your answers :) Nice vibrant flowers with intricate shapes.


The much over looked humble Buttercups with more Salsify feature with a kind of farmhouse table look.

 I hope you all enjoy my still life portfolio as much as I enjoyed creating it. The lighting was quite tricky in a small room and mostly featured 3 or 4 lights, with reflectors and home made Gobos. Quite time consuming to get it all just how I wanted it as even a slight shift of an inch or two made massive differences to how the light fell.

Do check out the other truly jaw droppingly beautiful portfolios that were placed and the other wonderful images from so many talented photographers in the rest of the categories. I absolutely adore the 1st place image. IGPOTY winning portfolios

In more good news, this week saw the publication of an excellent article ( in Amateur Photographer magazine ) written by the very innovative photographer, Tracy Calder, about mindfulness and photography, an approach I whole heartedly believe can help many people. Tracy kindly put my name forward for inclusion in the subsequent article which was superbly written by the lovely Geoff Harris. Geoff rang me for a little chat about the part photography has taken in my life, my struggles to actually manage photography with the symptoms of M.E. and benefits of using photography as a coping strategy. Its a great read with eye opening interviews from others who have employed photography as a tool to help themselves, its a sensitive subject and handled so well with Geoff's thoughtful and compassionate writing. Worth a read.


Today also saw the results of Close up photographer of the year's Two of a kind challenge. I was lucky enough to have two images make the stunning shortlist. Very chuffed to say that my image of the two Cyclamen made it to the gorgeous finalist selection. CUPOTY TWO OF A KIND WINNERS

This is one of my favourite images taken last year, sadly I can no longer reach this spot on my mobility scooter as it has been devastated by two storms within 2 months, with trees uprooted and hanging precariously. The paths are blocked for the second time in 2 months and I am told that the park is in a much worse state now. So this image is even more special to me, capturing a treasured spot where I practiced mindfulness for the last 2 years during the pandemic. Its a happy image, but tinged with loss of a much cherished woodland habitat.

Above "The Kiss" exquisite, delicate form and shape mixed with romantic pink ethereal haze in this portrait of winter Cyclamen.

A selection of images and tips from winners is to be published in Amateur photographer magazine next week, which could be interesting for those who enjoy a bit of close up imagery. ( I think I should get a commission for plugging a certain magazine this week! :D )

Now I have a question to ask you all, what would you like me to blog about on here?


Tuesday 1 February 2022

My first pagan celebration photo shoot this year

 After a tonne of planning I actually managed my first photo shoot in over 6 months, I only managed 2 last year and really hope to manage a handful of short shoots this year based on my plans here. The main thing that has held me back and slowed my progress is my health, but I am trying extra hard to plan in advance and have short photo shoots where I can rest and take my time.

I have wanted to produce a set of images based around the pagan wheel of year celebrations and associated characters, such as the well known Green man, as a personal project as I have an interest in paganism. There are 8 seasonal celebrations over the course of the year, starting with Imbolc - hailing the beginning of spring. Each of these celebrations have a lot of stories and elements connected to them, usually with several characters, often symbolising the progression of the seasons in various ways. I hope to incorporate as many key elements as I can into each photo shoot, so telling the story through images as best I can with props and locations if I can. For some I will adorn headwear or other accessories with items  that are connected.

 Imbolc heralds the beginnings of spring, occurring on the 1st -2nd of February. It is a time to let go of the past and welcome new beginnings. The original word Imbolg means "belly" which makes sense, as the earth is expectant with new life, in creatures and plants, with more light and warmth.

Model is Northern Redheadz on Instagram with make up by Faces by Lulu


I made the headwear specially for this photoshoot. Creating the central piece from clay, then painting it with snowdrops, a hare ( there are other stories involving a hare), a tree of life and a symbol of the triple Goddess. It is adorned with flowers - some which I pressed last year, white feathers,  (as swans are connected to Imbolc also) Leaves, a Celtic pendant, dragon flies, an owl and tree, all of which I made out of clay, other bird feathers and moss etc.


Part of celebrating Imbolc involves creating an alter compromising of various associated items such as Snowdrops or other early spring flowers. For me I will have my headwear to go with my snowdrops - not that I practice any ritual, I simply celebrate nature and the changing seasons. There are several lovely stories/folklore/legends involving Snowdrops and Imbolc ( or whatever different cultures call their own beginning of spring celebrations).

In Romania there is a festival known to be celebrated over 8000 years apparently where men tie red and white entwined threads around snowdrops and give them to women in their lives, celebrating male and female stren
gths. There are many lovely tales in lots of cultures where drops of blood result in snowdrops emerging too.


These images contain my interpretation of the Goddess Brigid, the Goddess of healing, poetry, crafts, metal smithing , fire and the sun, the triple Goddess in her maiden aspect who is one of the main characters involved with Imbolc, as well as the Green man in his Oak guise.  
 Colours that are usually linked to this event are white and green, so I chose a green outfit, Brigid is known for her green mantle ( cloak). In this first image we have the Goddess Brigid with Snowdrops - I did not pick these, they were kindly given to us by a gardener who was around during our shoot after we explained what we were doing.


In the background you can see a "Clootie" which is tied to a tree, these were often left as offerings on trees, near a well where possible - however I could not find a well nearby. We were hoping to shoot near water instead but that will need to be completed in a part two at a different location some time.


These next photos is Brigid with the eternal fire, as she is the Goddess of fire, often celebrated by the hearth fire too. ( the fire went out in some and I have not had time to add fire in just yet)

I wanted to add more magic, so added one of my old photos of Castlerigg stone circle in the background of one version.


These ones below also feature Brigids cross which can be made of grasses/ rushes etc but we had to improvise here. The crosses are thought to be connected to a pagan symbol but have also been used in Ireland, connected to stories of St Brigid. They are said to symbolise protection and are often hung over doorways, windows and hearths.


We also used white/green candles on her stone "alter" as candles are used by many in this tradition/ritual/celebration to celebrate both light and fire. Again our flames were blown out so I still need to get around to adding flames properly to the candles but didn't manage a good job in time to post these for Imbolc.


As Brigid is the Goddess of  healing, fertility, creativity, arts, crafts, metal smithing, poetry and much more, I want to also create more images in the future with her healing, in a forge, with baby lambs or other associated animals. I did manage an image of her reading poetry as a start, but ran out of energy, time and opportunities for creatures etc. So I will plan a part two of Imbolc, hopefully amongst spring flowers, with lambs and near water. I also plan to photograph the Green man in his Oak guise chasing away Jack Frost as part of the celebrations and have my headwear made, but still to sort costumes, plus I need to recover from this shoot first as its wiped me out even 5 days later. I must do a shorter shoot next.


Offerings are traditionally made in various ways, such as oats or porridge and milk, which are often poured into the earth or into water.


 The Green man (spring) in his Oak guise chases Jack Frost (winter) off. I will hopefully get around to shooting this element, but for now I took advantage of my lovely  models partner being present . Luckily he was happy enough to wear the outfit and pose too. 


The green man headwear is actually two pieces, both made by me, mostly out of clay and faux leaves plus moss. The horns are on a headband with acorns, pine cones and moss. The mask is tied on separately.

Models Northern Redheadz and A Rose imagery on Instagram
Make up by Faces by Lulu


I look forward to completing this set for Imbolc, maybe this year, or maybe next year as I find it takes a long to to recover from a photo shoot.

 Below is my favourite edit from this set so far, not quite the welcoming spring image I initially had in mind but I see it as the Goddess Brigid under the moon, ushering more light and warmth forth for the brighter dawn to come.


Thursday 20 January 2022

Gems of Autumn and the rest of the year!

 I love autumn for so many reasons, the fresh crispness of the morning air, the variety of flowers, seed heads, berries and fruit, the gorgeous changing hues and colours of foliage, the length of days, but most of all I relish the prospect of exploring peaceful woodlands full of life in anticipation of discovering the wonderful gems that the fungi kingdom provides us with. 

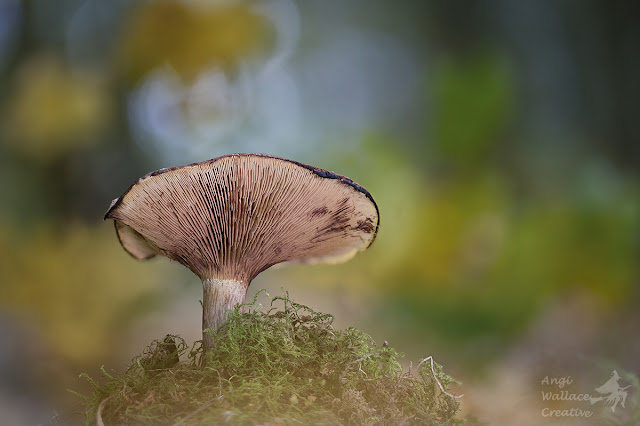
 Above Rufus milkcap which exudes a milky substance from its gills when damaged

I take pleasure in finding both new species that I have never laid eyes upon before as well as hoping to detect some pristine, more familiar specimens in photographic locations. I initially developed an interest in learning about mushrooms in my 20s, however a busy career and family life resulted in little time to spend on my new hobby. So I am delighted that I now find time to pursue another passion and have treat myself to a new book to aid my understanding plus help identification. ( My book "Mushrooms" by Roger Phillips - sadly Mr Phillips passed away recently - he has contributed so much in his field - do look up his books if you are interested in fungi) Luckily I can reach a few decent locations nearby that have good access for mobility scooters and I have friends who are happy to share their fungi finds so that we can all help each other to see more.


                    My kit for Fungi photography

The first thing I discovered in trying to photograph fungi is that I need a fair amount of kit, luckily I can fit this in a large bag on the back of my scooter and in a camera bag that fits in the basket sitting on the front - Im not sure how I would manage to carry it all if I was able to walk around again. So my bags contain :-

My partners Nikon Z6 plus his Sigma 105 macro lens ( yes he is very trusting!)- I take these along as they enable me to produce focus stacked images easier, the Z6 has in camera focus shift settings. This allows me to set a front focus point then set the amount of photos that I want the camera to take, plus the increments between each shot, timing between shots ( in case of using flash which may need time to recharge between firing). Whilst I can focus stack with my own camera, using a rail, I find the in camera focus shift method more accurate, quicker and less fiddly. Not to mention it helps me avoid adding a cumbersome rail to my bag.

Above - A Blackening waxcap, focus stacked


My A7iii camera mostly for single shots - I prefer this simply because I have a better choice of lenses with this camera but only one with my partners Nikon.

Lenses - Sigma 150 macro lens  my first choice of lens in most circumstances for this genre plus a lens tripod  collar to help with balance on the tripod.

Sony 90mm macro lens , Creative lenses such as Helios, Meyer Gorlitz Primoplan to allow for different approaches and results.

Macro extension tubes & Raynox 250 macro filter for much closer work

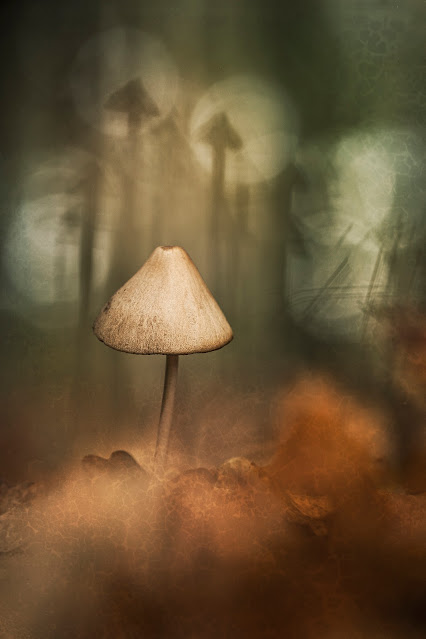
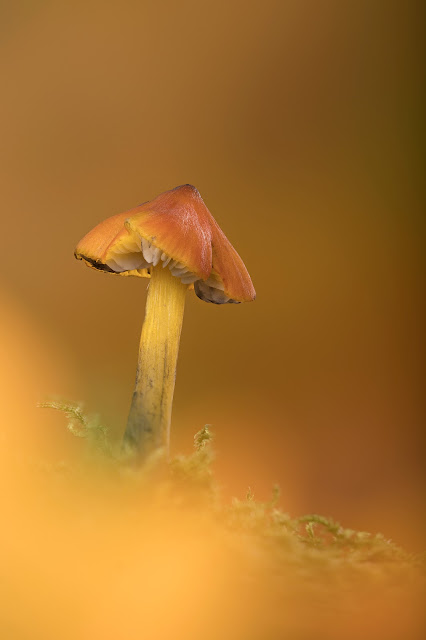
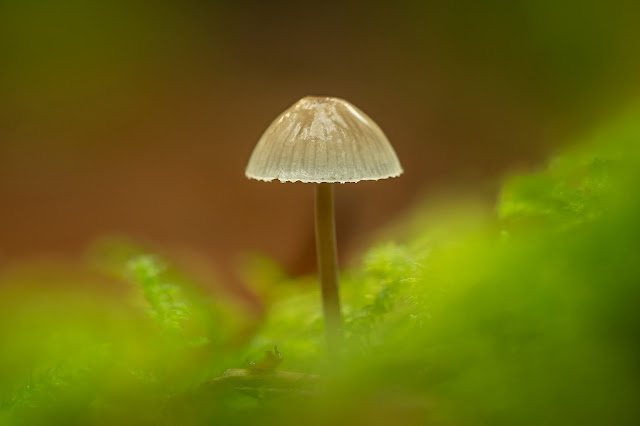
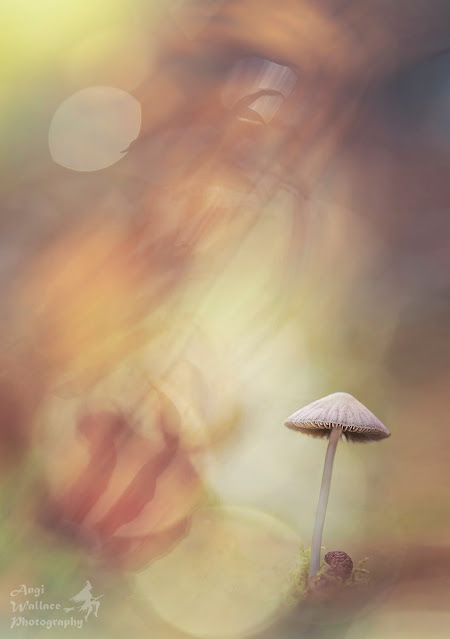
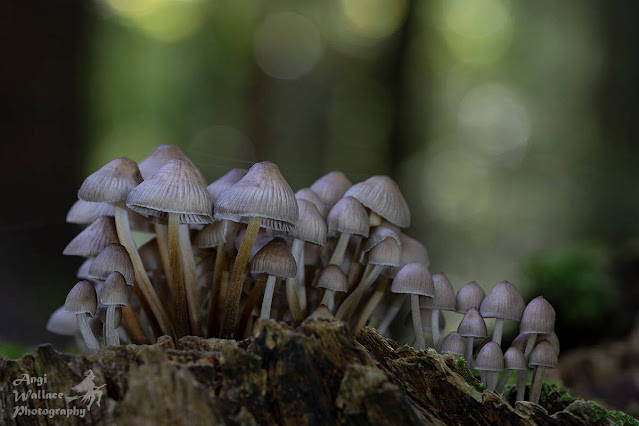
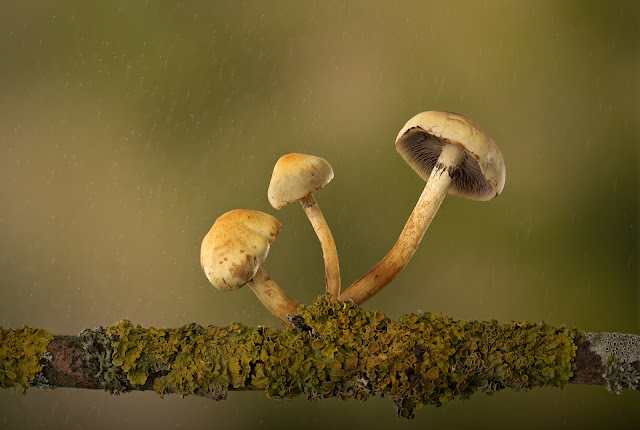
ABOVE Some sort of Bonnet I think

Mini tripod - I find that a small, adjustable and sturdy tripod is most useful. I use a Moman mini tripod with a Moman universal ball head. A normal tripod that allows flexibility and lets you get your camera close to the ground could work well, but where space is tight this could be problematic. I dont carry a normal tripod - I find that most of the timeI can manage fine without one as long as I have the mini tripod. Although if planning to photograph some of the fungi found on trees then a normal tripod would be wise.

LED light ( or 3) plus stand I use small continuous LED lights with an adjustable brightness, and a gorilla pod stand for flexibility

Above Verdigris agaric, focus stacked
Above One of the Brittlegills which I was unable to confirm identification on


Flash - ( I uses a  Godox AD200 ) - I take this as my 2nd LED light, but also as a flash option. Having two continuous light sources is very useful, especially if working against high sunshine or very dark conditions.

A Mat - I use a roll up mat to lie on, a foam camping mat could work or even a foil like emergency blanket is another lightweight, space saving option. Ive even used black bin bags before. Something easily wiped down afterwards is a good idea.

Waterproof trousers/jacket I wear padded waterproof trousers whenever I am going to be sitting or lying on the ground

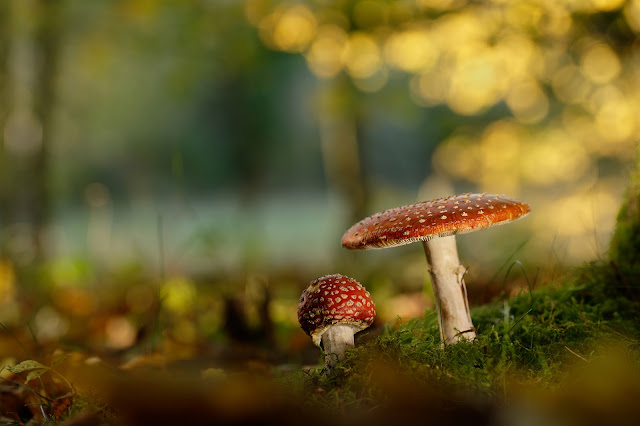
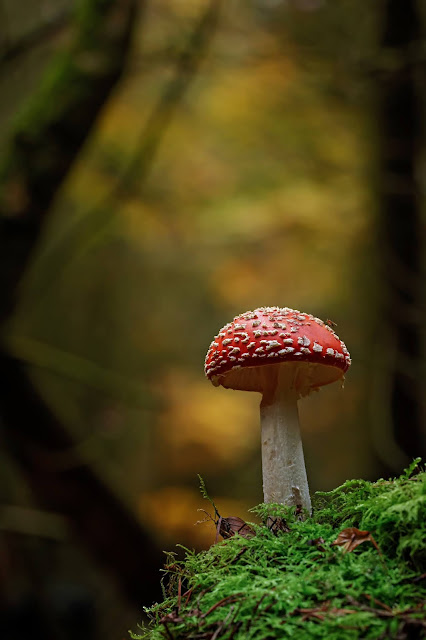
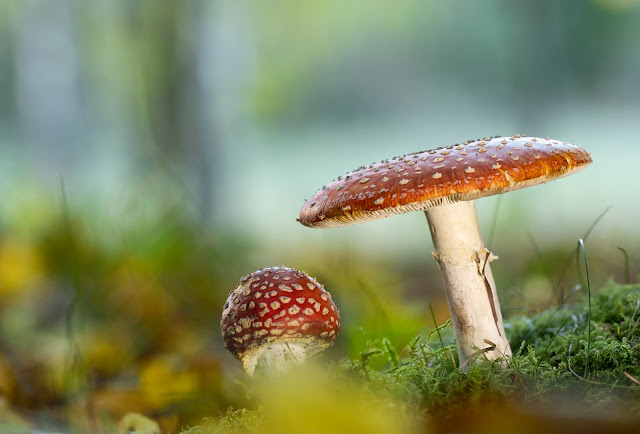
ABOVE Fly Agaric with a fly sitting on the cap

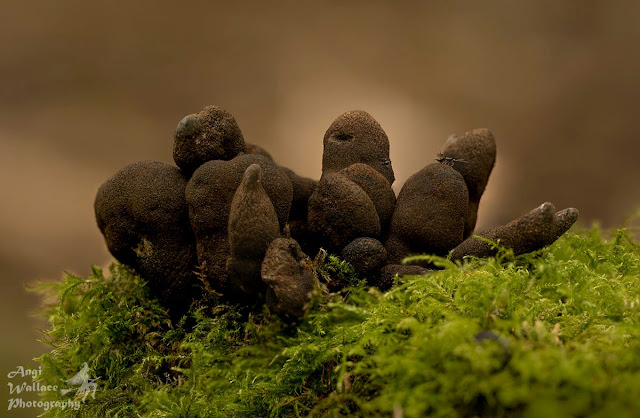
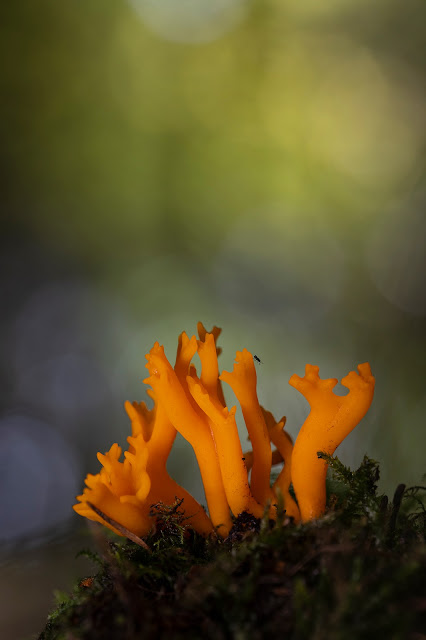
Above Dead mans fingers 


Cocktail sticks /Floristry wire - I frequently find wonderful fungi specimens kicked over, or wish to move them to a location with better access /backdrop to photograph them. Cocktail sticks provide an easy way to relocate them, sticking half in the mushroom and half in the ground.

Tupperware box with damp tissue or moss inside I use this to transport any specimens that I wish to relocate - it helps keep them in tact. The box doubles up to stand things on such as a 2nd light or foreground leaves.

Shutter release cable

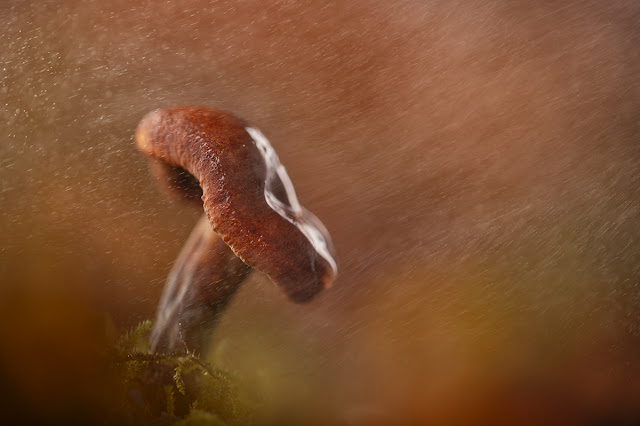
Optional - Water spray I take a tiny water spray to act as rain. Small brush or Blower to clean fungi
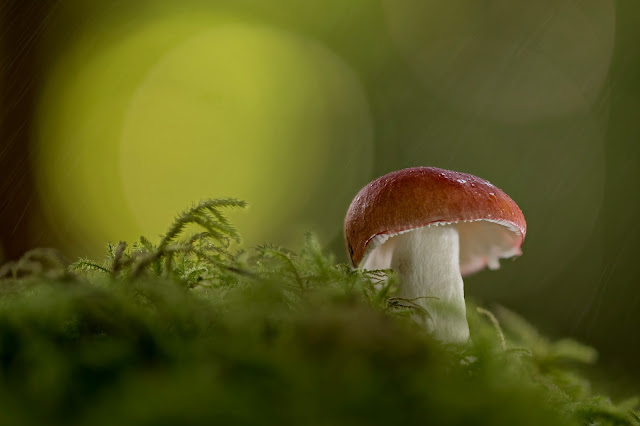
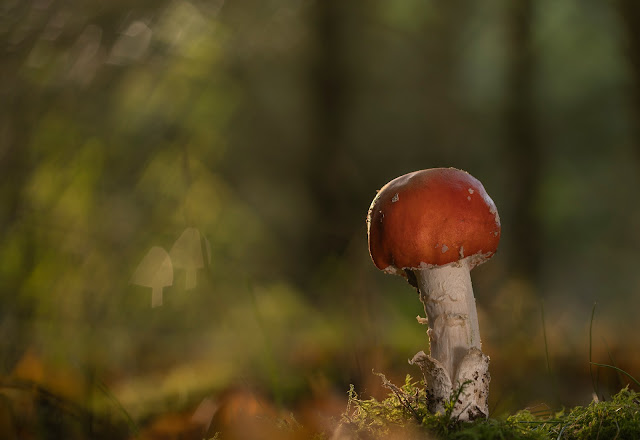
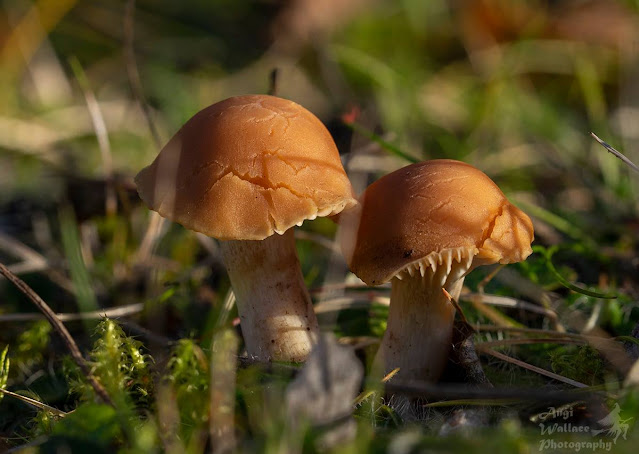
ABOVE Butter waxcap


Creative filters - Polarisers are very useful for wet mushrooms and those with slimy surfaces. ND filters can be useful if aiming for longer exposures. I also take crystals, sparkling fibres, holographic celophane and Lensbaby Omni filters if I'm in a creative mood. Small mirror, perspex, fairy lights.

Macro flash diffuser or small folding reflector that has the white diffuser too - for diffusing harsh sunlight and also to act as a reflector

Small but powerful torch if wanting to try light painting ( 1000 lumens or higher)

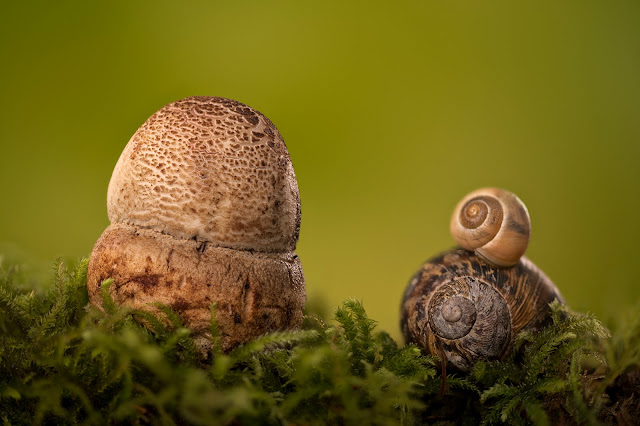
Other nature props such as acorns, horse chestnuts, discarded snail shells, berries, leaves, seed heads etc All can help to create a nice scene.

ABOVE One of the Russula/ Brittlegill mushrooms, focus stacked

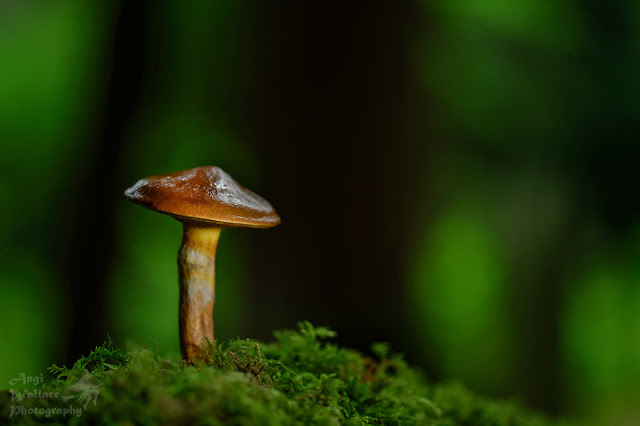
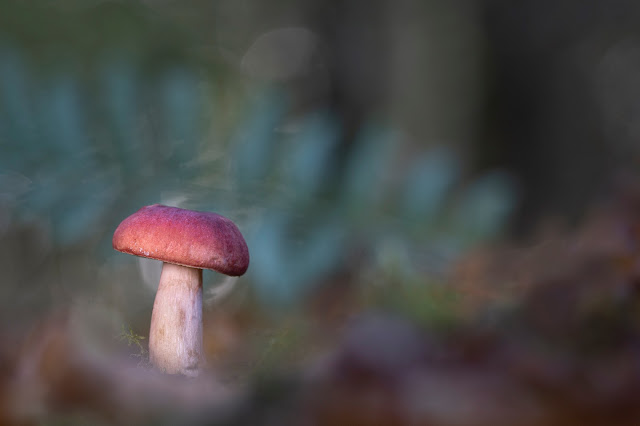
Above A Larch bolete I think


                                         Finding Fungi

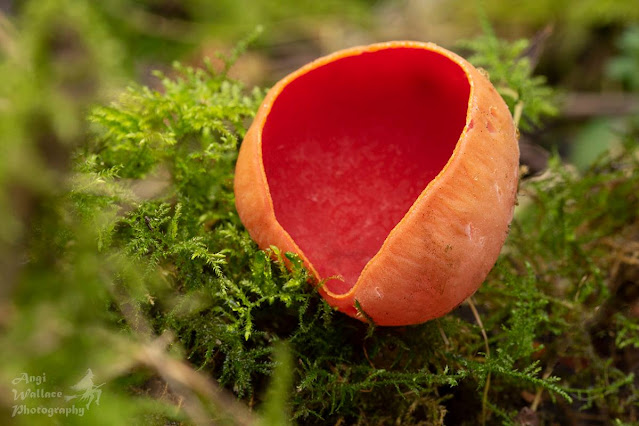
Fungi can be found pretty much all year round if you know where to look. This year I was alerted to some wonderful Scarlet cups (below) which I had not seen before, only a few ft from the path in our local Rising Sun country park ( where I've taken most of my fungi photos this last 2 years) at the beginning of March -  my first mushrooms of the year other than the various bracket fungi growing on trees. Last  year I was able to find mushrooms right through the autumn, and throughout November and December.

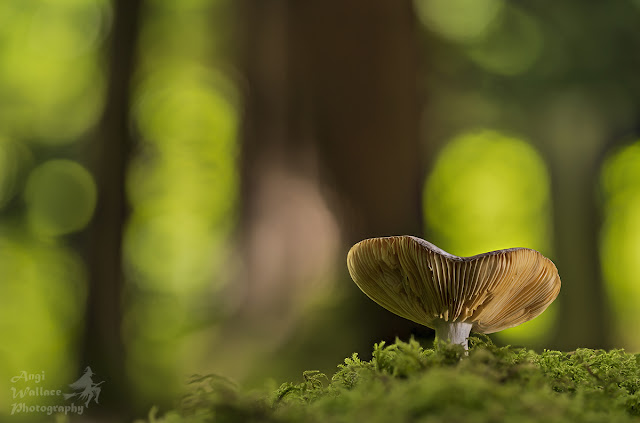
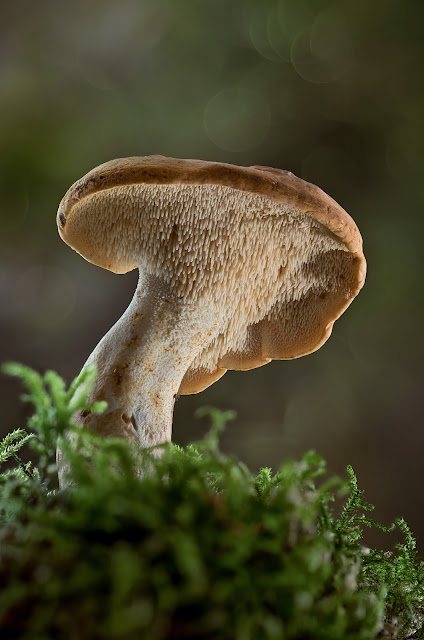
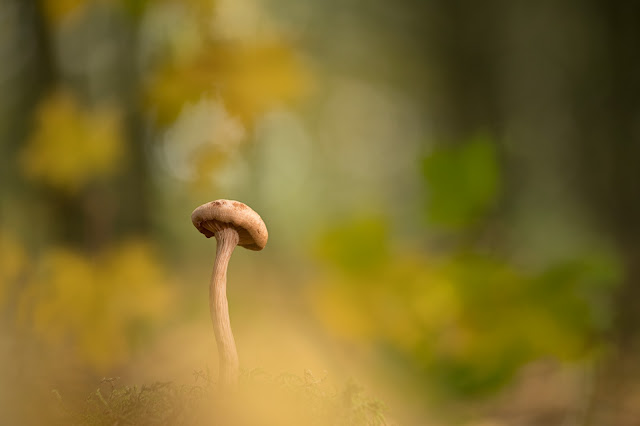
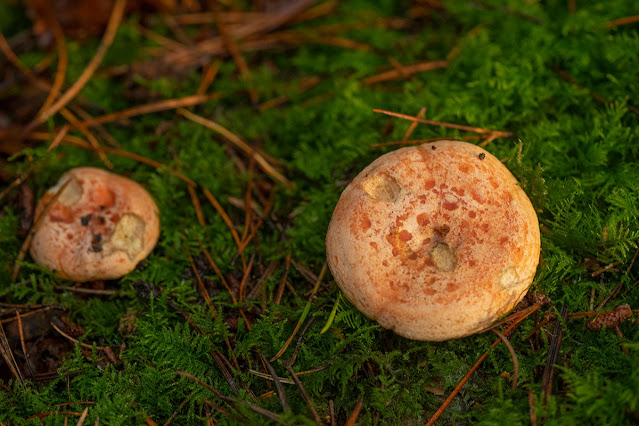
Above Some sort of Rusulla /Brittlegill

I would highly recommend a good book on fungi such as "Mushrooms" by Roger Phillips, this will help you with identifying them, and learning the habitat they grow in. Fungi can be found in all sorts of places, even sand, some of my own favourites - the Waxcaps are mostly found in grassland.
Getting to know the various fungi will give you a good indication of where to look in which month, observing which trees and plants/mosses are around can also help.

ABOVE Scarlet cup found early March

Above Silverleaf fungus

There are many local fungi groups that can be a useful resource, or some local parks/reserves have groups who enjoy wildlife/plant photography, either can be helpful in locating fungi specimens as these folk often have a great collective knowledge. I'm lucky that I've become friendly with lots of nature lovers frequenting our local parks and we alert each other when we spot something that may be of interest to each other. The What3words app can be helpful pinpointing such small items when sending each other locations.

ABOVE   Parrot Waxcap found in December
Above two different types of waxcaps ( I think Goblet and Vermillion)  focus stacked. These can be found in November and December.

Photographing the Fungi

Framing your shot


The great thing with fungi is that you usually have plenty of time to compose your image, looking at it from all sides to see which has the most striking appearance. Look for interesting features such as a nice curve in the cap, the gills or colour and consider cleaning off any distracting dirt with a blower or tiny artist’s brush to avoid damaging the specimen. Whilst examining your subject, do also look at the background and work out which might be more pleasing, as well as which lens to use. You may need to gently move some undergrowth, clip or tie back a few leaves, possibly snip a protruding piece of grass. Look to see which direction the light is coming from, how it hits the mushroom, is their glare in a wet cap or is it causing a distracting glare on a nearby leaf or blade of grass. For lens considerations, work out how much background you want to include. Are you aiming to produce the wider scene showing the fungi in its habitat or isolating it from its surroundings with a shallower depth of field. There is no wrong or right answer, but slowing down to carefully contemplate your options will help you achieve a more pleasing outcome.


 For the mushroom above I was drawn to the gills and the leaves in the background made for an appealing bokeh.


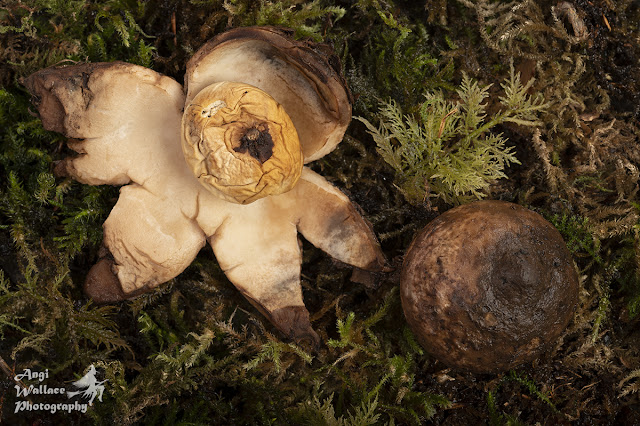
 Always consider getting down low because not only do the stems and gills have a lot of interest but the ground can provide a very pleasing haze. A camera with an articulating screen is most useful for this as it can save you from contorting yourself into uncomfortable positions and the resulting sore body parts, not to mention all the funny looks and comments you will get lying on the ground - I have lost count of the amount of people who approach me to make sure I am ok and have not had a stroke or seizure 😁. But this isn't the only way to capture the beauty of these natural sources, consider getting in very close for macro images or from above.  This Common Earth star below is shown best captured from above and compared to an unopened specimen. With fungi photography I find it harder to have leading lines in my compositions simply because of the size and nature of the genre, but frequently find myself using the rule of thirds more than any other compositions.


If the location of the mushroom and surrounding vegetation means good photography is out of the question then it may be acceptable to carefully  remove a specimen and relocate it.  I would suggest doing this as a last resort, only if it is identifiable and you are certain that it is not a rare fungi, and that it is fairly common in that vicinity. As the visible part of the mushroom is only the fruiting body of the organism, then picking one of a common type is much like picking one apple off a tree. This is where your tupperware box with damp tissue will come in handy for safe transportation to your chosen spot. Then you can use a piece of floristry wire or  cocktail stick to help reposition the mushroom into the ground without it falling over.


A puffball fungi releasing spores, I prodded it from behind to get this.


I found this Fly agaric mushroom kicked over by a path, it was in two separate pieces and it was the only specimen that I could find, so out came my cocktail sticks. A little photoshop helped me to blend the break in the stem and gave me a pleasing image.  It also gave me the opportunity to experiment with bokeh that day, by placing a smaller mushroom between the lens and the main subject I was able to achieve a mushroom shaped bokeh.


Aperture

 Obviously you will need to consider your aperture carefully depending on what you are wanting to

produce. For a single image it can be possible to get the whole mushroom in focus whilst isolating it

from the background, depending on how much vegetation is nearby. For smaller mushrooms this is

easier to achieve using apertures as low as F2.8 if you have a longer lens like a 150 or 180 mm macro

lens, it can be more difficult if using a shorter length lens. With the medium to larger mushrooms then 

an aperture of anywhere between F 5.6 and F11 can usually help get most of the mushroom in focus,

but this will depend on a range of factors, not just the focal length of your lens but the distance between

the lens and mushroom, plus the diameter of the fungi cap - if its a very wide cap then this can make

it harder to get both fully in focus.

 If focus stacking then its easier to use a wide open aperture and obtain the lovely smooth bokeh in

foreground and background such as below.

I find that piling a few leaves between the camera and subject can be a useful way to get that soft

haze


Lighting 


Your lighting can make all the difference in fungi photography, particularly deep in the woods where

little ambient light is getting through. Even when you do have good light streaming through the trees,

it can then ruin your shot if the cap is slimy. This is precisely why I carry polariser filters and a small

hand held diffuser/reflector. Prior to making these part of my kit, I often found it impossible to get the

shot I wanted due to the conditions. Having your camera all set up on the tripod with a long enough

cable release or using the timer allows you to position yourself with a diffuser, or if you are lucky and

its not blowing a gale then you can prop it or clip it in place.


 Whilst it would be preferable to diffuse any lighting used in lighting mushrooms, I simply do not have

room in my bags for any more kit. I do sometimes use my mini diffusers or the inner diffuser of a

reflector if needed. Most of the time I find I do not need them. Lighting can help to shape your fungi

just as it helps to flatter faces in portraiture etc, so do try placing your lights and different angles and

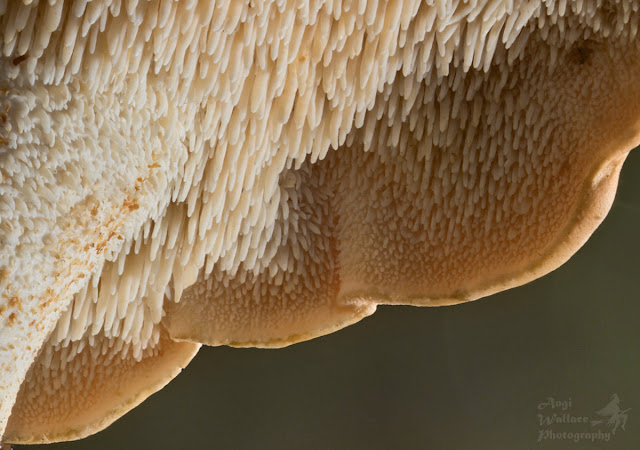
heights. This Hedgehog mushroom below was lit by three lights to show off its unusual pointed underside

to its cap


Below A close up of the Hedgehog fungi spikes


These striking Amethyst deceiver mushrooms below, were lit in my home studio by three lights, one from the front and two behind to back light them and the water spray.  This is a focus stacked image where I sprayed water in the last couple of frames and used the best one. This helped to avoid having dripping wet mushrooms.


 Whilst focus stacking is too much to cover in this blog I would recommend that if attempting this outdoors that attention is paid to the weather, as in my experience, even a wind of 5 mph can produce the odd gust which can ruin your stack -  by swaying a slender mushroom ever so slightly or blowing leaves across your shots. So do check the forecast and plan ahead

Another suggestion is to use the shutter cable release or time function to avoid any vibrations.
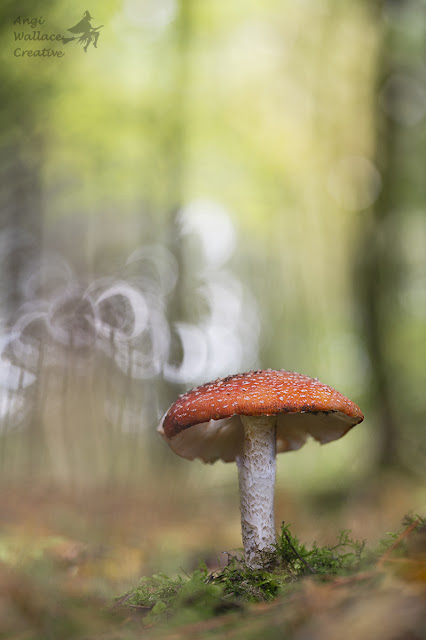

Above Fly Agarics


I try to get creative and include aspects to give my image impact or captivate my audience, such as

the addition of water spray , delightful bokeh or including other aspects of nature such as insects or

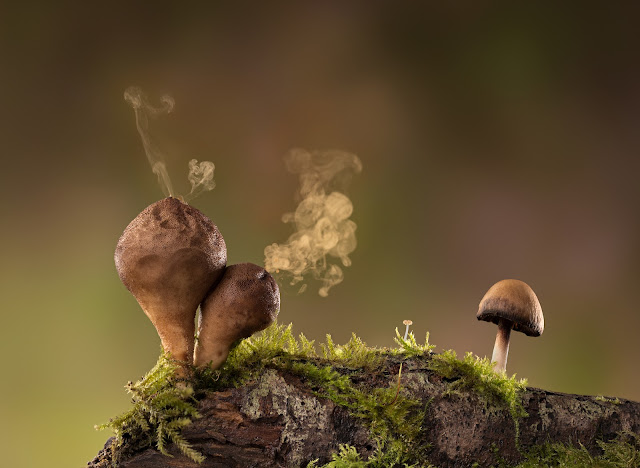
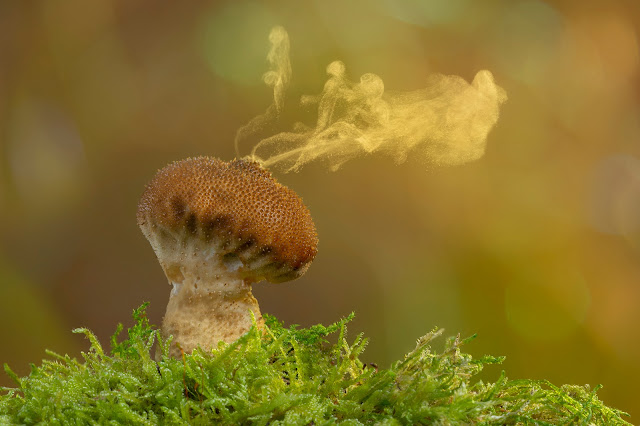
cones/nuts/berries etc. I even use fungi in still life. In this image below I prodded the puffballs with

a piece of floristry wire from behind to release their spores.


Dont forget to take some quick identification snaps so that you can label them correctly or enable you

 to seek help as I often do. Even the experts need to know the colours, if it has gills or pores, the 

texture of the cap and stem, any colour changes or smells as well as the habitat, any trees growing nearby.


I have included a large array of fungi photos below, that I have managed to photograph in the last couple of years, with a few older photos where you can see that I had not fine tuned my photography at all in this area, but they are included for interest in the species. Note that most of these were taken either just a couple of miles from our home in our local country park, or within a few miles. All in accessible woodlands. I am hoping to improve and capture many more fascinating specimens this year, with an aim to photograph 100 different species over the year. I have already photographed 4 varieties in January without really looking and I know from friends that there are quite a few around this month, so hoping to get out soon on a mushroom hunt.


I hope I have piqued your interest in this subject and would love to see your fungi images, do post link in the comments. Please do take great care in identification particularly if intending to eat any mushrooms, there are far too many mushrooms that look alike and they can be deadly or make you very ill.


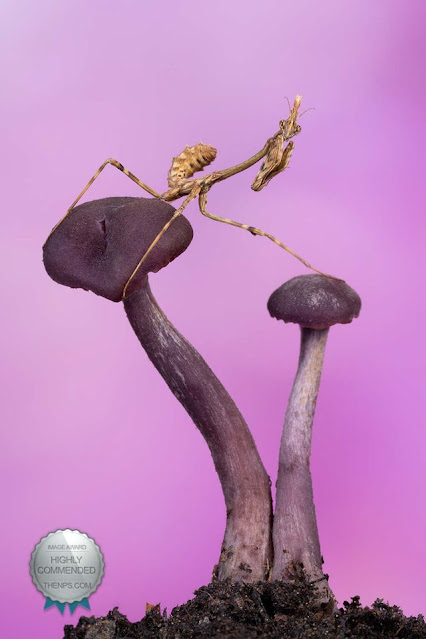
Above Amethyst deceivers with a preying mantis
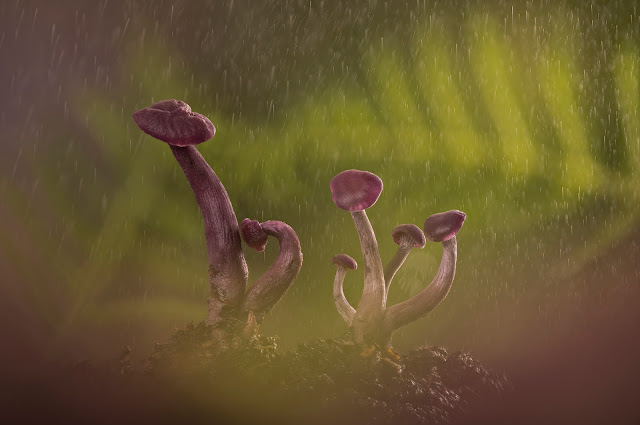
Above Fairy ink caps focus stacked


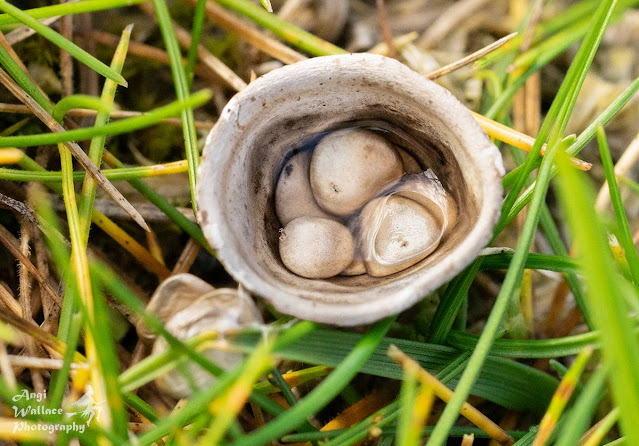
Above Birds nest fungi


Above Fly agaric with in camera mushroom bokeh
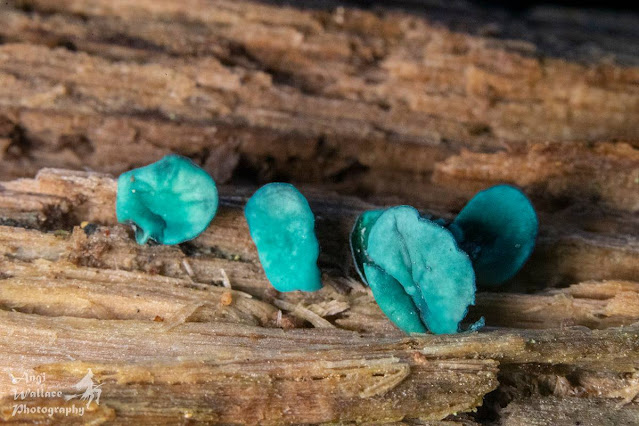
Above Green Elf cups - a fabulous, tiny fungi that stains trees blue/green. This wood was favoured by carpenters

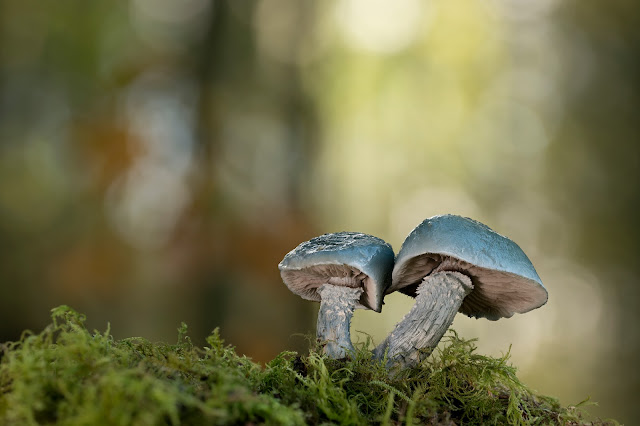
Above Blue roundhead focus stacked

Above a type of Ink cap

Above, Fly agaric focus stacked

Above photographed using a creative lens - a reversed glass Helios 44


Above Staghorn fungi


Above Rooting shank I think

Above a type of tree bracket fungi

Above Stinking earth fan I think

Above Amanita submembranacea


Above Rhubarb and custard fungi


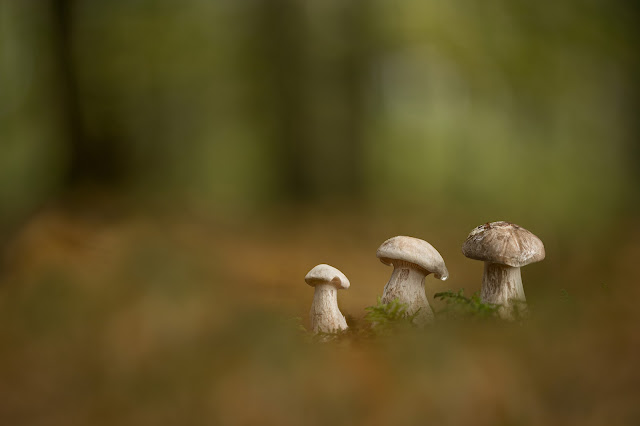
Above and below Penny buns I think


Above and below a type of brittlegill


Above Blue roundhead


Above Olive shaggy parasol I believe


Above Shaggy scale caps
Above Clouded agaric


Above ? Deadly fibrecap

Above Meadow waxcaps

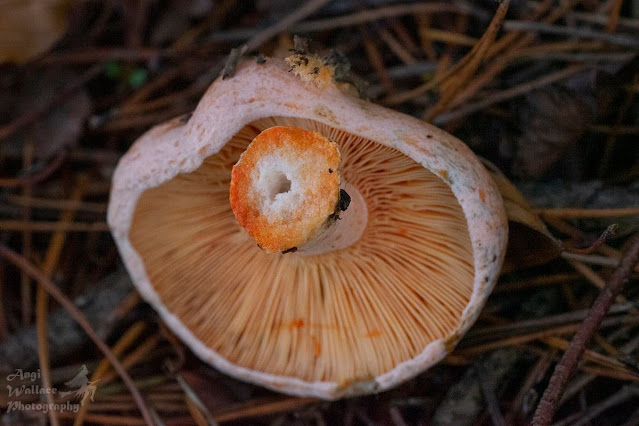
Above Saffron milkcaps which have wonderful colours upon cutting open , these are supposed to be very tasty, but I have never tried them. See below for example of how it can look cut open


Above and below Sulphur tuft mushrooms


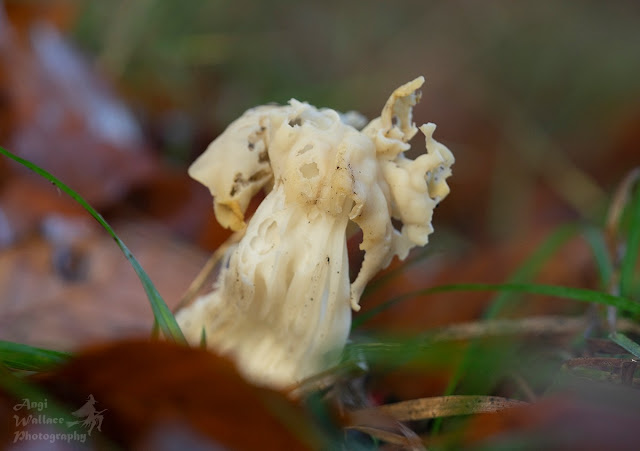
Above White saddle / Elfen saddle mushroom

Blessed Ostara and submerged flowers

 I am still tinkering away creating submerged floral images and thoroughly enjoying myself. Lots of people have been in touch asking questio...