I love autumn for so many reasons, the fresh crispness of the morning air, the variety of flowers, seed heads, berries and fruit, the gorgeous changing hues and colours of foliage, the length of days, but most of all I relish the prospect of exploring peaceful woodlands full of life in anticipation of discovering the wonderful gems that the fungi kingdom provides us with.
Above Rufus milkcap which exudes a milky substance from its gills when damagedI take pleasure in finding both new species that I have never laid eyes upon before as well as hoping to detect some pristine, more familiar specimens in photographic locations. I initially developed an interest in learning about mushrooms in my 20s, however a busy career and family life resulted in little time to spend on my new hobby. So I am delighted that I now find time to pursue another passion and have treat myself to a new book to aid my understanding plus help identification. ( My book "Mushrooms" by Roger Phillips - sadly Mr Phillips passed away recently - he has contributed so much in his field - do look up his books if you are interested in fungi) Luckily I can reach a few decent locations nearby that have good access for mobility scooters and I have friends who are happy to share their fungi finds so that we can all help each other to see more.
My kit for Fungi photography
The first thing I discovered in trying to photograph fungi is that I need a fair amount of kit, luckily I can fit this in a large bag on the back of my scooter and in a camera bag that fits in the basket sitting on the front - Im not sure how I would manage to carry it all if I was able to walk around again. So my bags contain :-
My partners Nikon Z6 plus his Sigma 105 macro lens ( yes he is very trusting!)- I take these along as they enable me to produce focus stacked images easier, the Z6 has in camera focus shift settings. This allows me to set a front focus point then set the amount of photos that I want the camera to take, plus the increments between each shot, timing between shots ( in case of using flash which may need time to recharge between firing). Whilst I can focus stack with my own camera, using a rail, I find the in camera focus shift method more accurate, quicker and less fiddly. Not to mention it helps me avoid adding a cumbersome rail to my bag.
Above - A Blackening waxcap, focus stackedMy A7iii camera mostly for single shots - I prefer this simply because I have a better choice of lenses with this camera but only one with my partners Nikon.
Lenses - Sigma 150 macro lens my first choice of lens in most circumstances for this genre plus a lens tripod collar to help with balance on the tripod.
Sony 90mm macro lens , Creative lenses such as Helios, Meyer Gorlitz Primoplan to allow for different approaches and results.
Macro extension tubes & Raynox 250 macro filter for much closer work
ABOVE Some sort of Bonnet I thinkMini tripod - I find that a small, adjustable and sturdy tripod is most useful. I use a Moman mini tripod with a Moman universal ball head. A normal tripod that allows flexibility and lets you get your camera close to the ground could work well, but where space is tight this could be problematic. I dont carry a normal tripod - I find that most of the timeI can manage fine without one as long as I have the mini tripod. Although if planning to photograph some of the fungi found on trees then a normal tripod would be wise.
LED light ( or 3) plus stand I use small continuous LED lights with an adjustable brightness, and a gorilla pod stand for flexibility
Above Verdigris agaric, focus stackedAbove One of the Brittlegills which I was unable to confirm identification on
Flash - ( I uses a Godox AD200 ) - I take this as my 2nd LED light, but also as a flash option. Having two continuous light sources is very useful, especially if working against high sunshine or very dark conditions.
A Mat - I use a roll up mat to lie on, a foam camping mat could work or even a foil like emergency blanket is another lightweight, space saving option. Ive even used black bin bags before. Something easily wiped down afterwards is a good idea.
Waterproof trousers/jacket I wear padded waterproof trousers whenever I am going to be sitting or lying on the ground
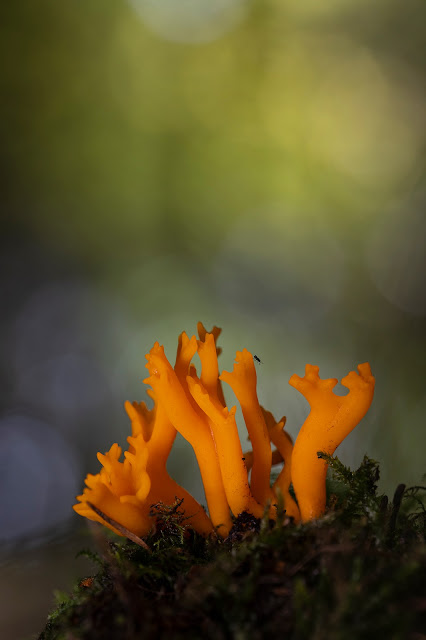
ABOVE Fly Agaric with a fly sitting on the capAbove Dead mans fingers
Cocktail sticks /Floristry wire - I frequently find wonderful fungi specimens kicked over, or wish to move them to a location with better access /backdrop to photograph them. Cocktail sticks provide an easy way to relocate them, sticking half in the mushroom and half in the ground.
Tupperware box with damp tissue or moss inside I use this to transport any specimens that I wish to relocate - it helps keep them in tact. The box doubles up to stand things on such as a 2nd light or foreground leaves.
Shutter release cable
Optional - Water spray I take a tiny water spray to act as rain. Small brush or Blower to clean fungi
ABOVE Butter waxcapCreative filters - Polarisers are very useful for wet mushrooms and those with slimy surfaces. ND filters can be useful if aiming for longer exposures. I also take crystals, sparkling fibres, holographic celophane and Lensbaby Omni filters if I'm in a creative mood. Small mirror, perspex, fairy lights.
Macro flash diffuser or small folding reflector that has the white diffuser too - for diffusing harsh sunlight and also to act as a reflector
Small but powerful torch if wanting to try light painting ( 1000 lumens or higher)
Other nature props such as acorns, horse chestnuts, discarded snail shells, berries, leaves, seed heads etc All can help to create a nice scene.
ABOVE One of the Russula/ Brittlegill mushrooms, focus stackedFinding Fungi
Photographing the Fungi
Framing your shot
The great thing with fungi is that you usually have plenty of time to compose your image, looking at it from all sides to see which has the most striking appearance. Look for interesting features such as a nice curve in the cap, the gills or colour and consider cleaning off any distracting dirt with a blower or tiny artist’s brush to avoid damaging the specimen. Whilst examining your subject, do also look at the background and work out which might be more pleasing, as well as which lens to use. You may need to gently move some undergrowth, clip or tie back a few leaves, possibly snip a protruding piece of grass. Look to see which direction the light is coming from, how it hits the mushroom, is their glare in a wet cap or is it causing a distracting glare on a nearby leaf or blade of grass. For lens considerations, work out how much background you want to include. Are you aiming to produce the wider scene showing the fungi in its habitat or isolating it from its surroundings with a shallower depth of field. There is no wrong or right answer, but slowing down to carefully contemplate your options will help you achieve a more pleasing outcome.
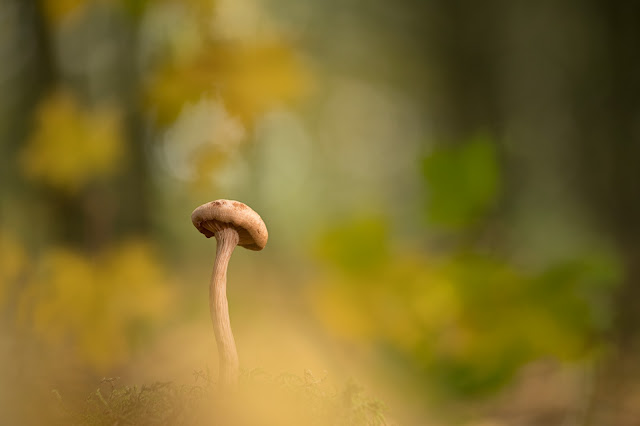
For the mushroom above I was drawn to the gills and the leaves in the background made for an appealing bokeh.
Always consider getting down low because not only do the stems and gills have a lot of interest but the ground can provide a very pleasing haze. A camera with an articulating screen is most useful for this as it can save you from contorting yourself into uncomfortable positions and the resulting sore body parts, not to mention all the funny looks and comments you will get lying on the ground - I have lost count of the amount of people who approach me to make sure I am ok and have not had a stroke or seizure 😁. But this isn't the only way to capture the beauty of these natural sources, consider getting in very close for macro images or from above. This Common Earth star below is shown best captured from above and compared to an unopened specimen. With fungi photography I find it harder to have leading lines in my compositions simply because of the size and nature of the genre, but frequently find myself using the rule of thirds more than any other compositions.
If the location of the mushroom and surrounding vegetation means good photography is out of the question then it may be acceptable to carefully remove a specimen and relocate it. I would suggest doing this as a last resort, only if it is identifiable and you are certain that it is not a rare fungi, and that it is fairly common in that vicinity. As the visible part of the mushroom is only the fruiting body of the organism, then picking one of a common type is much like picking one apple off a tree. This is where your tupperware box with damp tissue will come in handy for safe transportation to your chosen spot. Then you can use a piece of floristry wire or cocktail stick to help reposition the mushroom into the ground without it falling over.
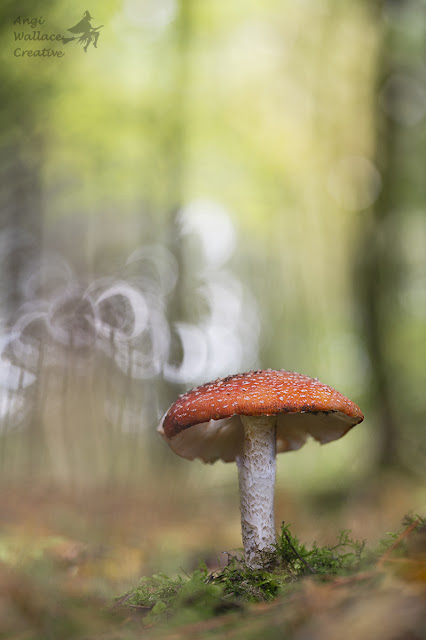
I found this Fly agaric mushroom kicked over by a path, it was in two separate pieces and it was the only specimen that I could find, so out came my cocktail sticks. A little photoshop helped me to blend the break in the stem and gave me a pleasing image. It also gave me the opportunity to experiment with bokeh that day, by placing a smaller mushroom between the lens and the main subject I was able to achieve a mushroom shaped bokeh.
Aperture
Obviously you will need to consider your aperture carefully depending on what you are wanting to
produce. For a single image it can be possible to get the whole mushroom in focus whilst isolating it
from the background, depending on how much vegetation is nearby. For smaller mushrooms this is
easier to achieve using apertures as low as F2.8 if you have a longer lens like a 150 or 180 mm macro
lens, it can be more difficult if using a shorter length lens. With the medium to larger mushrooms then
an aperture of anywhere between F 5.6 and F11 can usually help get most of the mushroom in focus,
but this will depend on a range of factors, not just the focal length of your lens but the distance between
the lens and mushroom, plus the diameter of the fungi cap - if its a very wide cap then this can make
it harder to get both fully in focus.
If focus stacking then its easier to use a wide open aperture and obtain the lovely smooth bokeh in
foreground and background such as below.
I find that piling a few leaves between the camera and subject can be a useful way to get that soft
haze
Lighting
Your lighting can make all the difference in fungi photography, particularly deep in the woods where
little ambient light is getting through. Even when you do have good light streaming through the trees,
it can then ruin your shot if the cap is slimy. This is precisely why I carry polariser filters and a small
hand held diffuser/reflector. Prior to making these part of my kit, I often found it impossible to get the
shot I wanted due to the conditions. Having your camera all set up on the tripod with a long enough
cable release or using the timer allows you to position yourself with a diffuser, or if you are lucky and
its not blowing a gale then you can prop it or clip it in place.
Whilst it would be preferable to diffuse any lighting used in lighting mushrooms, I simply do not have
room in my bags for any more kit. I do sometimes use my mini diffusers or the inner diffuser of a
reflector if needed. Most of the time I find I do not need them. Lighting can help to shape your fungi
just as it helps to flatter faces in portraiture etc, so do try placing your lights and different angles and
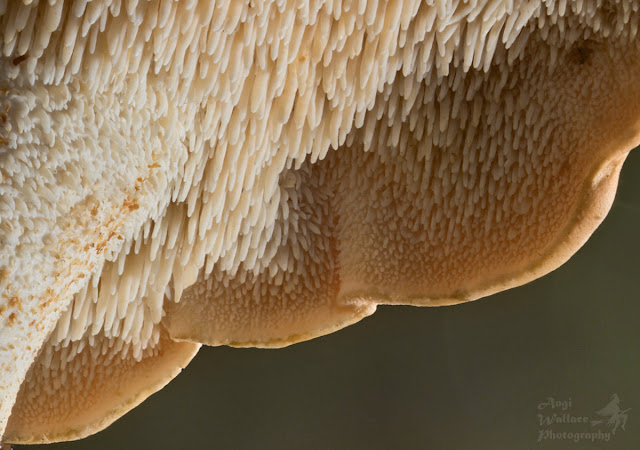
heights. This Hedgehog mushroom below was lit by three lights to show off its unusual pointed underside
to its cap
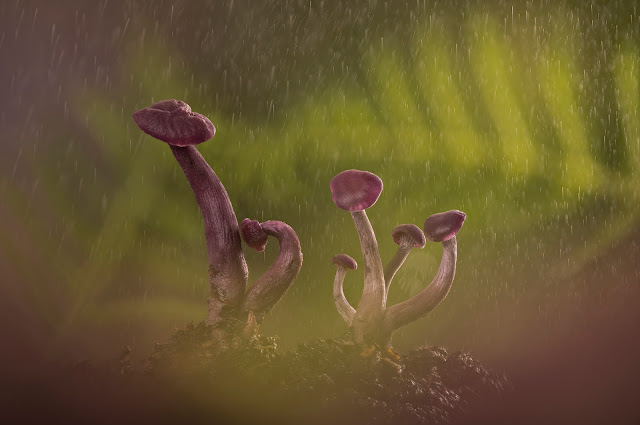
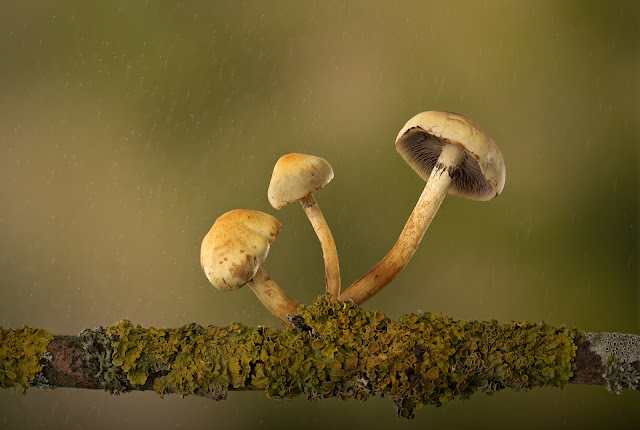
These striking Amethyst deceiver mushrooms below, were lit in my home studio by three lights, one from the front and two behind to back light them and the water spray. This is a focus stacked image where I sprayed water in the last couple of frames and used the best one. This helped to avoid having dripping wet mushrooms.
Whilst focus stacking is too much to cover in this blog I would recommend that if attempting this outdoors that attention is paid to the weather, as in my experience, even a wind of 5 mph can produce the odd gust which can ruin your stack - by swaying a slender mushroom ever so slightly or blowing leaves across your shots. So do check the forecast and plan ahead
Another suggestion is to use the shutter cable release or time function to avoid any vibrations.
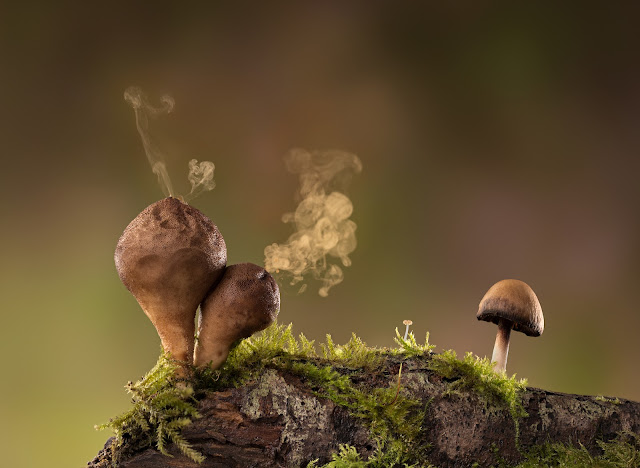
I try to get creative and include aspects to give my image impact or captivate my audience, such as
the addition of water spray , delightful bokeh or including other aspects of nature such as insects or
cones/nuts/berries etc. I even use fungi in still life. In this image below I prodded the puffballs with
a piece of floristry wire from behind to release their spores.
Dont forget to take some quick identification snaps so that you can label them correctly or enable you
to seek help as I often do. Even the experts need to know the colours, if it has gills or pores, the
texture of the cap and stem, any colour changes or smells as well as the habitat, any trees growing nearby.
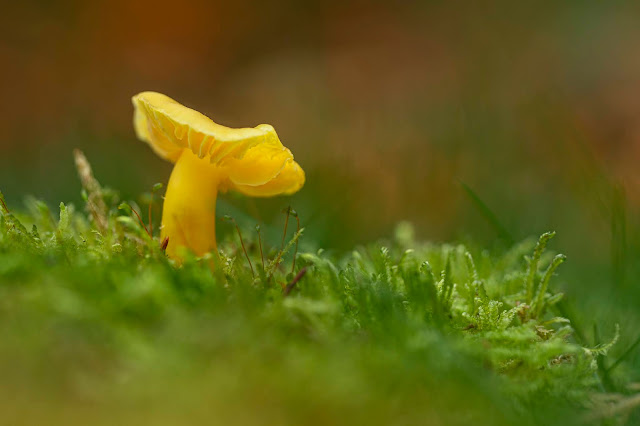
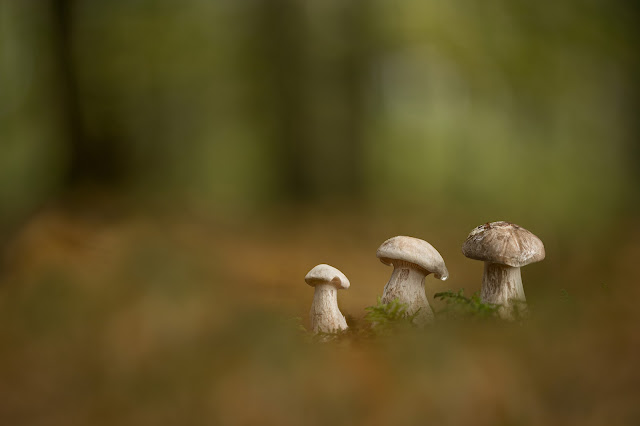
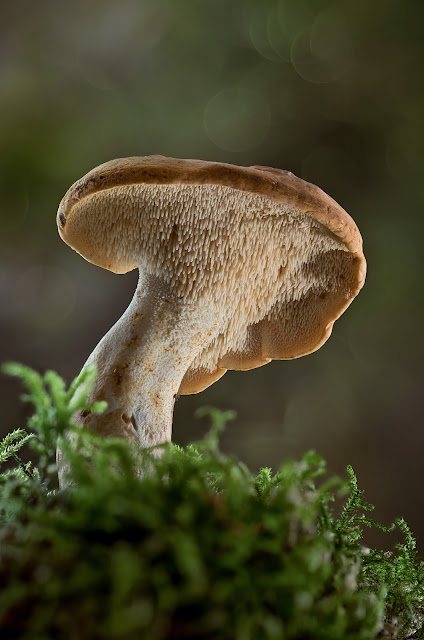
I have included a large array of fungi photos below, that I have managed to photograph in the last couple of years, with a few older photos where you can see that I had not fine tuned my photography at all in this area, but they are included for interest in the species. Note that most of these were taken either just a couple of miles from our home in our local country park, or within a few miles. All in accessible woodlands. I am hoping to improve and capture many more fascinating specimens this year, with an aim to photograph 100 different species over the year. I have already photographed 4 varieties in January without really looking and I know from friends that there are quite a few around this month, so hoping to get out soon on a mushroom hunt.
I hope I have piqued your interest in this subject and would love to see your fungi images, do post link in the comments. Please do take great care in identification particularly if intending to eat any mushrooms, there are far too many mushrooms that look alike and they can be deadly or make you very ill.
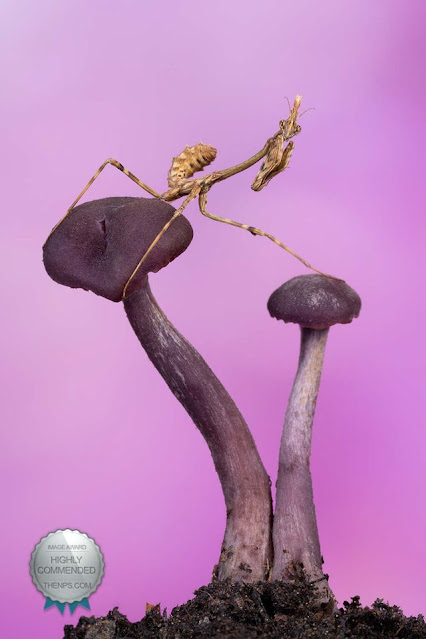
Above Amethyst deceivers with a preying mantis
Above Fairy ink caps focus stacked
Above Fly agaric with in camera mushroom bokehAbove Green Elf cups - a fabulous, tiny fungi that stains trees blue/green. This wood was favoured by carpenters
Above Saffron milkcaps which have wonderful colours upon cutting open , these are supposed to be very tasty, but I have never tried them. See below for example of how it can look cut open















Fantastic work and very helpful tips ! Thank you, Angi !
ReplyDeleteThank you Carmen, Im glad you found it useful
DeleteWonderful!!
ReplyDeleteThank you
DeleteVery good photos! I'll try to remember to check out your blog (didn't see a way to sign up for email alerts of new blog entries - I'm not a regular blog reader). Funny that you call these mushrooms/photos "gems" - I've collected attractive gems & minerals for 60 years, finding a few good mineral photo groups on FB recently, and also moving into mushroom photo "gems" in the last 5 years. Thank you for sharing what you have learned. I do photography myself but am not in an area now with abundant mushrooms (central NC).
ReplyDeleteThanks for your comment, I hope you find some places nearby with fungi - I recently found one of my most interesting ones in a supermarket car park!
DeleteThanks so much for sharing this! I am at the point, where lots of these tips will be very helpfull. While looking through your photos, I saw several memorable ones - love your style. Wondering, though, what temperate zone you live in. I'm in Denmark, next to a great forest (Teglstrup Hegn) for mushrooms. Sorry, no link to my photos.
ReplyDeleteThanks for your comment, I live in the UK, up north, not too far from Scotland.
ReplyDelete